Drilling Holes in Tiles
Sawing Recesses
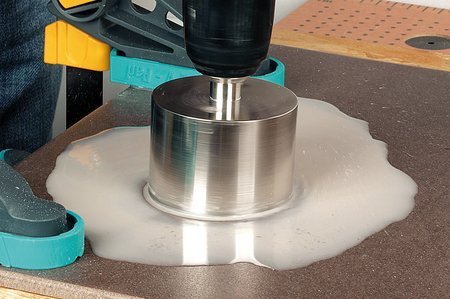
To enable you to successfully drill holes into hard tiles at the first try, for bathroom fittings, mounting holes for sockets, drain pipes, heater lines, recessed floor spotlights and water connections, we have developed a high-quality diamond hole saw with integrated water cooling for cordless screwdrivers.
This hole saw makes it possible to use a cordless screwdriver to accurately saw extremely hard tiles – a feat that usually requires professional tools – and is available in diameters Ø 18 – 83 mm.
Hole Saws with Integrated Water Cooling
While the high-quality industrial diamonds on the saw edge accurately cut through the hardest stone, a water-soaked sponge inside the annular bit provides the urgently needed cooling. The escaping water absorbs the friction heat. This effectively cools down the cutting surface and directly binds any dust that forms.
Advantages of Hole Saws with Integrated Water Cooling
Minimised risk of slipping during pilot drilling
Minimised risk of slipping during pilot drilling
Thanks to the slightly protruding TC centring drill, the hole saw can be accurately placed at the desired position and does not move away during pilot drilling. Only after the circumference has penetrated a few millimetres into the tile should the centring drill bit be removed. Now drilling can continue without it.
Integrated water cooling
Integrated water cooling
To protect the TC coating during the drilling process, soak the supplied sponge in water and then place it in the hole saw. No additional water reservoir is required.
Low dust formation
Low dust formation
The integrated water cooling binds the dust directly in the bore hole as it forms.
Drilling Tiles in 6 Steps
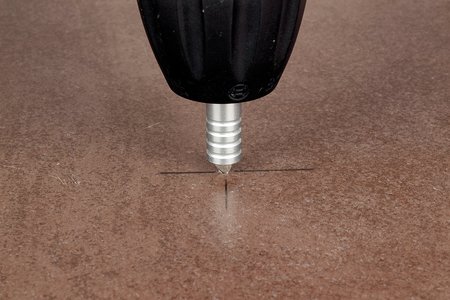
1. Drilling the guide hole
The guide hole is first marked and
then drilled with the centring drill bit as part of the preparations.
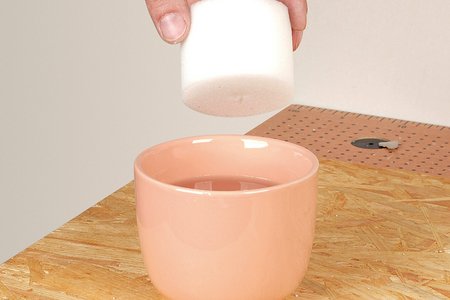
2. Sponge for cooling
Completely soak the supplied sponge in water and place it back inside the hole saw. This permanently cools the material and thus protects it.
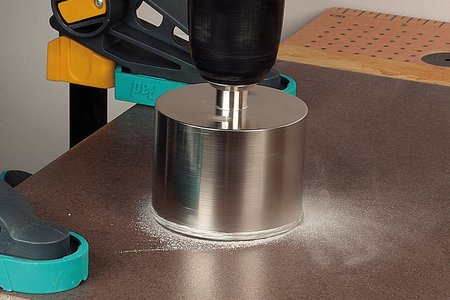
3. Initial drilling
Initial drilling on the tile, until the max. depth stop of the centring drill has been reached. Make sure that the hole saw is positioned at a right angle to the surface.
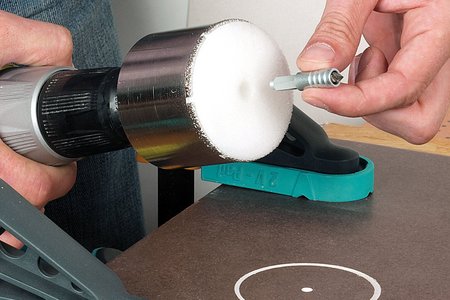
4. Removing the centring drill bit
Subsequently, remove the centring drill.
5. Continuing the cut
Place the hole saw in the existing contours of the initial cut and proceed with the drilling. Make sure that enough water is present for cooling during the process.
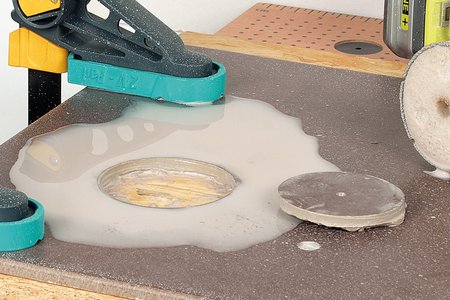
6. Clean result
Remove the now-loose material and then clean the tile. Thanks to the Ceramic Hole Saw, you achieve a perfect cut.
Frequently Asked Questions
How many holes can I drill with the diamond hole saw?
How many holes can I drill with the diamond hole saw?
That varies significantly and it is not possible to give a universally valid answer to this question. The number of holes depend on various factors: material, machine, diameter of the hole saw, rotational speed and applied pressure.
In the internal quality assurance inspection on test machines for TÜV certification (German technical inspection association), wolfcraft's hole saws have to be capable of drilling at least 20 holes in granite tiles.
At which point in the drilling process do I remove the centring drill bit?
At which point in the drilling process do I remove the centring drill bit?
The centring drill is used for creating a pilot drill hole, so that the hole saw does not slip off the tile and scratch it. For the rest of drilling procedure, the centring drill bit is removed from the hole saw, either when the first grooves on the diameter of the tile can be used as guide, or when the depth stop of the centring drill makes contact with the tile.
Which materials can I drill?
Which materials can I drill?
You can drill all hard materials that are used for tiled floors or walls – e.g. granite, marble, fine stoneware or ceramics.
Other Projects
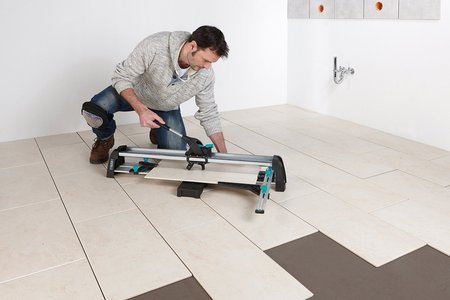
Cutting Tiles
Find out more about innovative tile cutters that help both amateurs and professionals with their work.
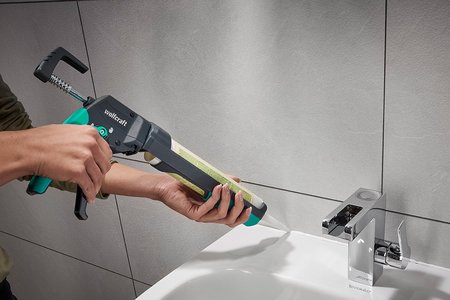
Applying Silicone Joints
With the joint repair kit, unsightly silicone joints can be removed and renewed with ease.


