The project
Laying laminate and vinyl is a popular home improvement project that even inexperienced DIYers can tackle with confidence.
With our products for cutting, laying and measuring, taking on this project is now even easier, faster and safer.
Even though the laying process has become so easy, there are still DIYers who don’t quite have the confidence to tackle it. That’s why we are continuously working on making laying laminate and vinyl easier, faster and safer with our new tools.
Lots of photos and tips and tricks on how you can lay your dream floor even more quickly and easily with our clever products make this guide the perfect reference for any questions about laying laminate and vinyl.
Instructional Video: The Right Way to Lay Laminate
Simple click systems make laying laminate and vinyl child’s play and lend living spaces a radiant new look for just a small investment of time.
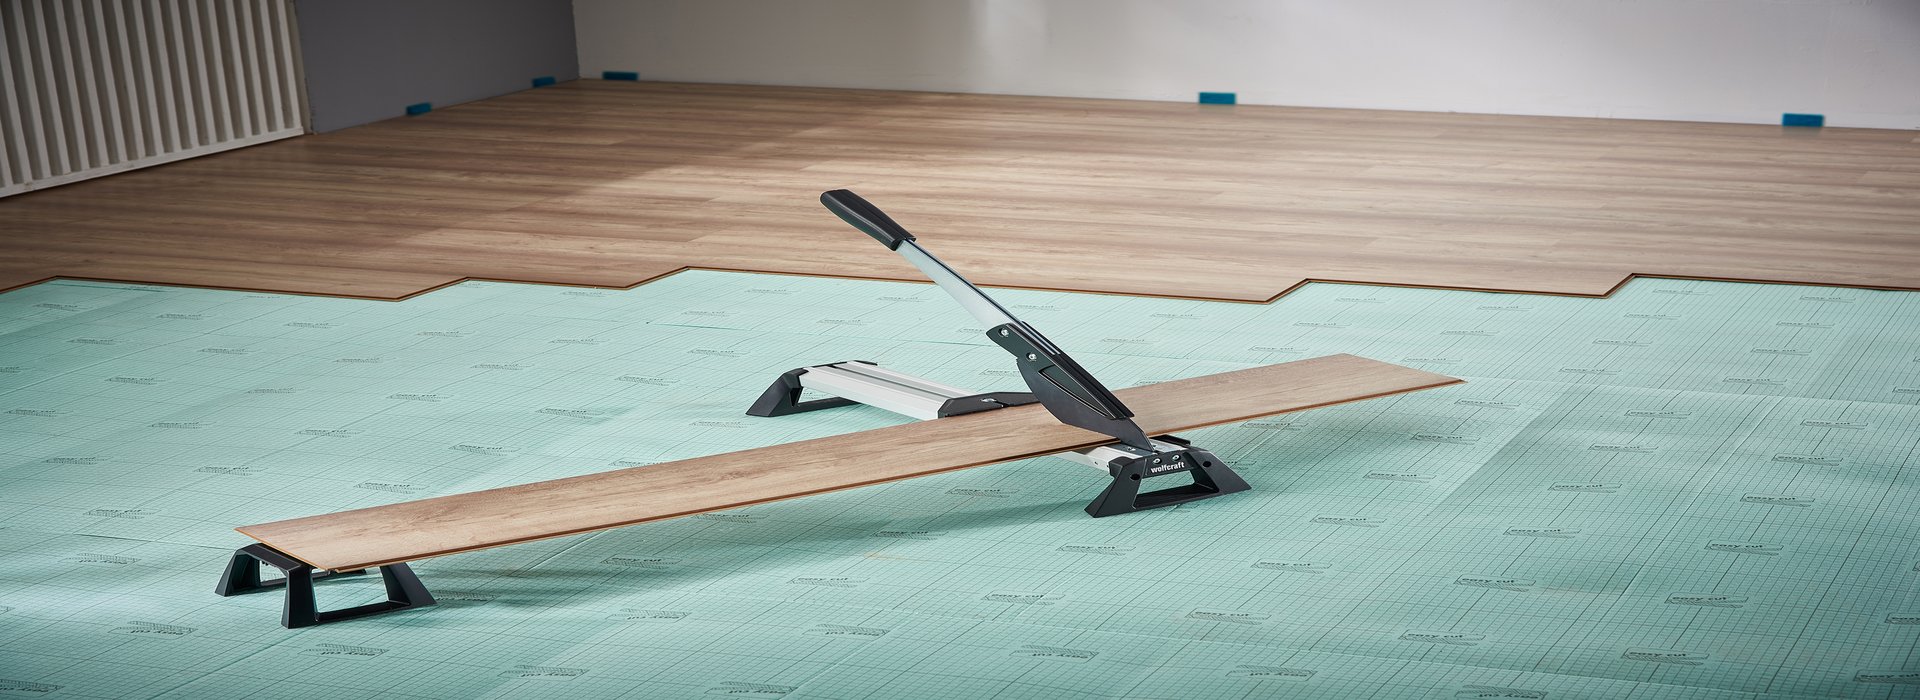
Laying tool
In addition to a high-quality laminate cutter, it is mainly the small, somewhat unassuming accessories that can make the difference between success and failure when laying floors.


Laminate or Vinyl Flooring
What are the most important differences?
What are the most important differences?
Laminate
Laminate is normally much less expensive than parquet and in some cases can also be a less expensive alternative to a classic carpet. However, you should not choose the cheapest version because they are not as durable and the floor will appear worn after just a short period of time.
High-quality laminate floors have a much more durable surface and can therefore be installed in areas that are frequented more often. The decor layers are manufactured with such high, sophisticated quality that even professionals sometimes have difficulty telling the difference between artificial wood decor and a genuine wood surface.
The simple glueless laying principle of the click system also makes laminate floors easy to remove and install elsewhere. For many renovation jobs, the low wood density (min. 7 mm) of a laminate floor is a decisive advantage.
Vinyl boards
Vinyl boards with a click system have been widely available for several years. These resilient floors consist either entirely of a durable, robust vinyl material or a vinyl layer affixed to a carrier board similar to laminate (usually a high-density fibreboard, HDF).
They are also usually floating, i.e. not affixed to the surface underneath, and are easy to replace if they become damaged. The springy vinyl not only offers superior walking comfort, it also provides outstanding footfall sound insulation.
This flexible material allows the creation of deceptively genuine, deep-textured reproductions of wood or stone surfaces (e.g. tiled appearance).
Vinyl or solid vinyl?
Vinyl or solid vinyl?
Solid vinyl
Solid vinyl floors are already available in a self-adhesive variant (thickness of 2 mm and above) and are therefore perfect for renovation work where the floor level cannot be raised much further.
The surface underneath must be completely level, however, as any unevenness in a flexible floor will become more apparent as time goes by.
Unlike a cold tiled floor, floors made from solid vinyl are not only much warmer, they are also more resistant to objects falling on them.
A solid vinyl floor is suitable for wet areas such as kitchens or bathrooms because the material is completely waterproof and does not swell.
Vinyl
Vinyl floors with a HDF carrier are usually available from a thickness of 6 mm or more. These floors smooth over small areas of unevenness and are therefore easy to lay on top of existing floors. However, they are generally unsuitable for laying in damp rooms because they may swell if water penetrates the joins.
All conventional vinyl floors can be laid on underfloor heating systems without any problems. The only downside is that a floor made from vinyl boards is generally more expensive than a laminate floor. Having said that, a vinyl floor is more durable, extremely quiet and easy to clean.
The perfect floor for families with children and pets. The low-emission, low-allergenic vinyl floors are even suitable for allergy sufferers.
Vinyl boards
Vinyl boards with a click system have been widely available for several years. These resilient floors consist either entirely of a durable, robust vinyl material or a vinyl layer affixed to a carrier board similar to laminate (usually a high-density fibreboard, HDF).
They are also usually floating, i.e. not affixed to the surface underneath, and are easy to replace if they become damaged. The springy vinyl not only offers superior walking comfort, it also provides outstanding footfall sound insulation.
This flexible material allows the creation of deceptively genuine, deep-textured reproductions of wood or stone surfaces (e.g. tiled appearance).
Advantages vs. disadvantages of laminate
Advantages vs. disadvantages of laminate
+ Easy to lay
+ Easy to clean & robust
+ Wide range of styles
+ Less expensive
+ Hard-wearing
- Not a natural product
- Sensitive to moisture
- Relatively loud footfall sound
Advantages vs. disadvantages of vinyl
Advantages vs. disadvantages of vinyl
+ Easy to lay
+ Easy to clean & robust
+ Wide range of styles
+ Quiet and comfortable underfoot
+ Warm underfoot & suitable for damp rooms
- Not a natural product
- Slightly more expensive than laminate
Before starting laying
Floating laying
Floating laying
Laminate flooring is usually placed on the laying surface so that it "floats". In other words, the flooring is not bonded or secured to the laying surface. The laminate floor must remain a sufficient distance from the surrounding walls, however, so that it can expand when subjected to temperature and air humidity fluctuations. If this space is not provided, the floor will bulge.
This is why it is extremely important to leave a minimum clearance of approx. 10 mm between the laminate floor and the wall. This gap will then be closed off perfectly by a skirting board.
Pretreatment of the laying surface
Pretreatment of the laying surface
Pretreatment of the laying surface also plays an important role. If the flooring is to be directly placed on a screed floor, it is imperative that you lay a special PE foil as a vapour barrier against rising damp. In new buildings, it is also advisable to determine in advance the residual moisture in concrete floors. You should also level out any unevenness in the laying surface that exceeds 3 – 4 mm along a length of one metre with a self-spreading filler beforehand. Under no circumstances should you directly lay wooden flooring on carpets.
Footfall sound insulation
Footfall sound insulation
If you want good footfall sound insulation, the building trade offers numerous well-engineered products that achieve a high degree of soundproofing and level out unevenness in the laying surface. The use of footfall sound insulation is indispensable and should also match the existing laying surface. Popular 2 mm footfall sound foam insulation, for example, is not suitable for laying on underfloor heating systems.
A wide range of footfall sound insulation systems are available on the market, depending on the laying surface. Ribbed boards and approx. 2 mm thick special foam are most frequently used. Ecological insulation made from granulated cork or felt can also be a good alternative. Seek advice from the supplier and also ask what the manufacturer of the floor covering recommends. These companies often offer a hotline service to provide advice should you require it.
Laminate with integrated footfall sound insulation
Laminate with integrated footfall sound insulation
The trade offers a number of floor types with integrated footfall sound insulation. Corresponding footfall sound insulation in the form of foam or felt is bonded to the back of the floor boards.
This means that you save yourself the trouble of rolling out insulation but the selection of insulation available is limited. You should examine each application individually and obtain advice from a specialist, if necessary.
Rolling out footfall sound insulation
Rolling out footfall sound insulation
Rolling or laying out footfall sound insulation is extremely easy. You should always ensure that the rolled out sheets do not overlap. It is therefore advisable to secure the adjacent edges of the individual sheets with adhesive tape so that the sheets do not slide over one another.
We recommend that you roll out footfall sound insulation in the same direction as the laying direction. This has the advantage that you initially only have to roll out one sheet and can then lay some rows of boards. If you roll the footfall sound insulation out crosswise to the laying direction, you can only lay the other rows by walking over the insulation, possibly causing damage.

Determining the laying direction
After the laying surface has been pre-treated and the footfall sound insulation has been installed, you must decide on the laying direction of the laminate flooring based on the main source of light in the room. If there are several windows, the one that lets most light into the room is the main source. If the laying direction follows the main source of light, the joints are not so easy to detect. The laying direction can have a positive effect on the room size.
Step-by-Step Instructions: Laying Laminate or Vinyl
Have you all the materials ready and the preparatory steps completed? Then let's get started! The following instructions explain each of the steps in detail and give you useful tips. We recommend watching our instructional video for additional information.

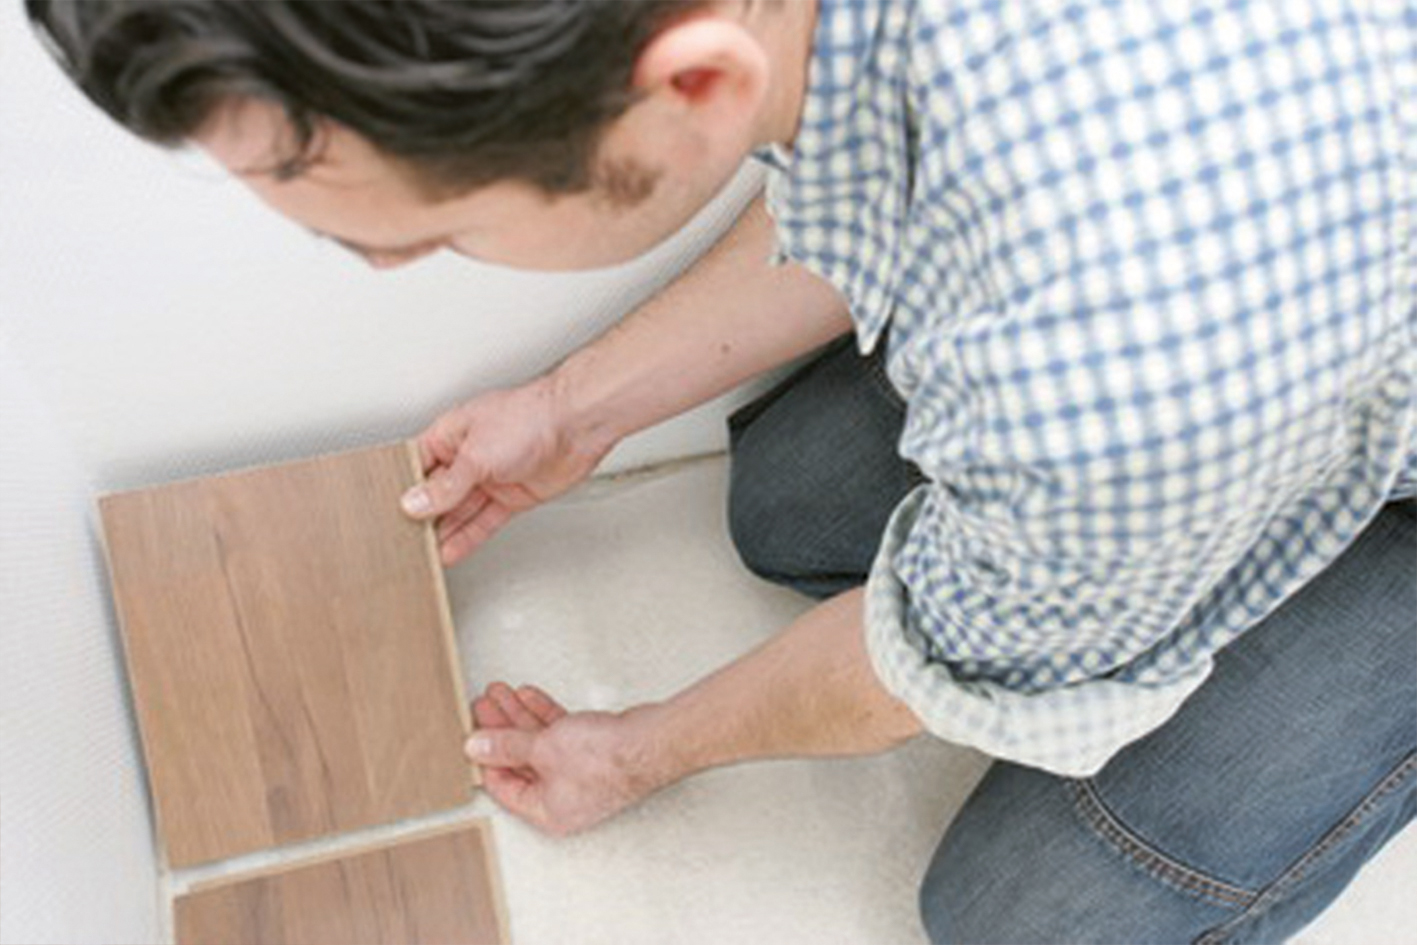
Step 1: Laying the first row of boards
Start by laying the first boards along the wall. You should mark any projections/unevenness of the wall on the floor board using an angle and then cut them out with a jigsaw.
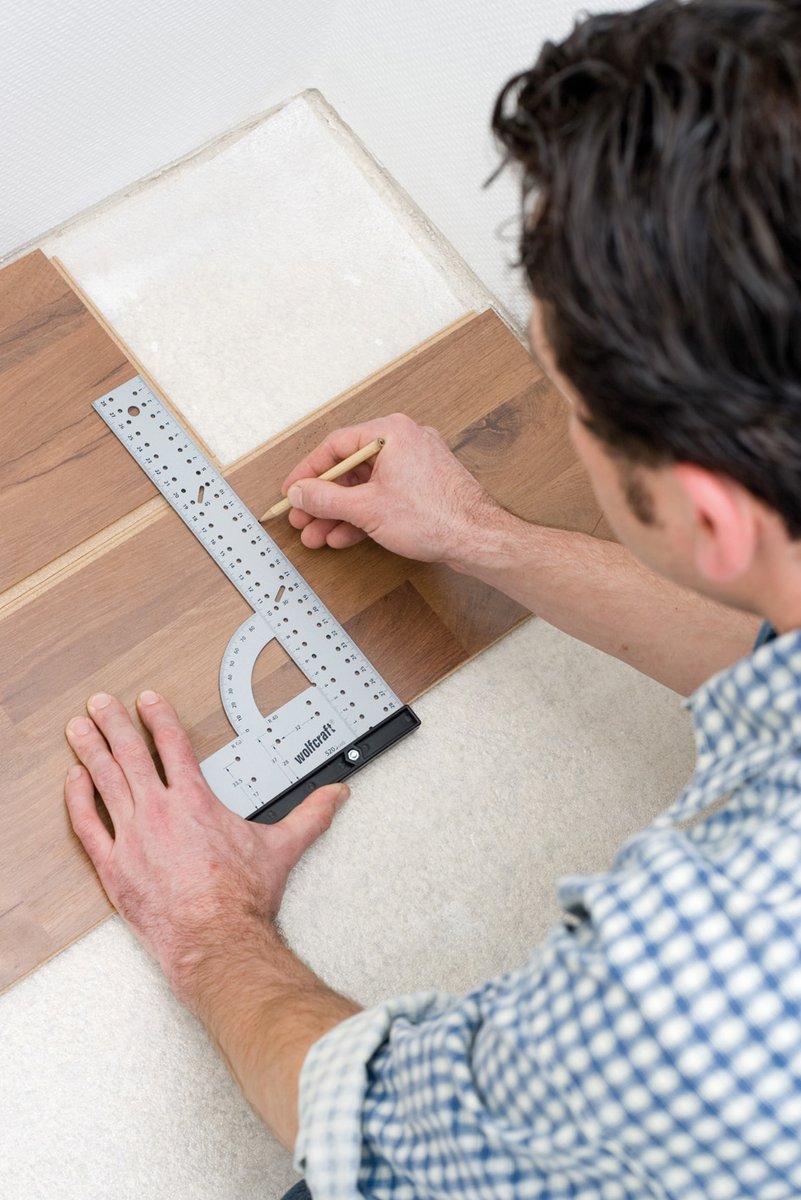
Step 2: Mark the last board in the row
Place the tongue of one floor board against the tongue of the row of boards that are already laid. Leave sufficient wall clearance for the required expansion joint.
Now all you have to do is place an angle over the floor board, align it with the end of the floor board row and mark out the kerf line with a pencil.
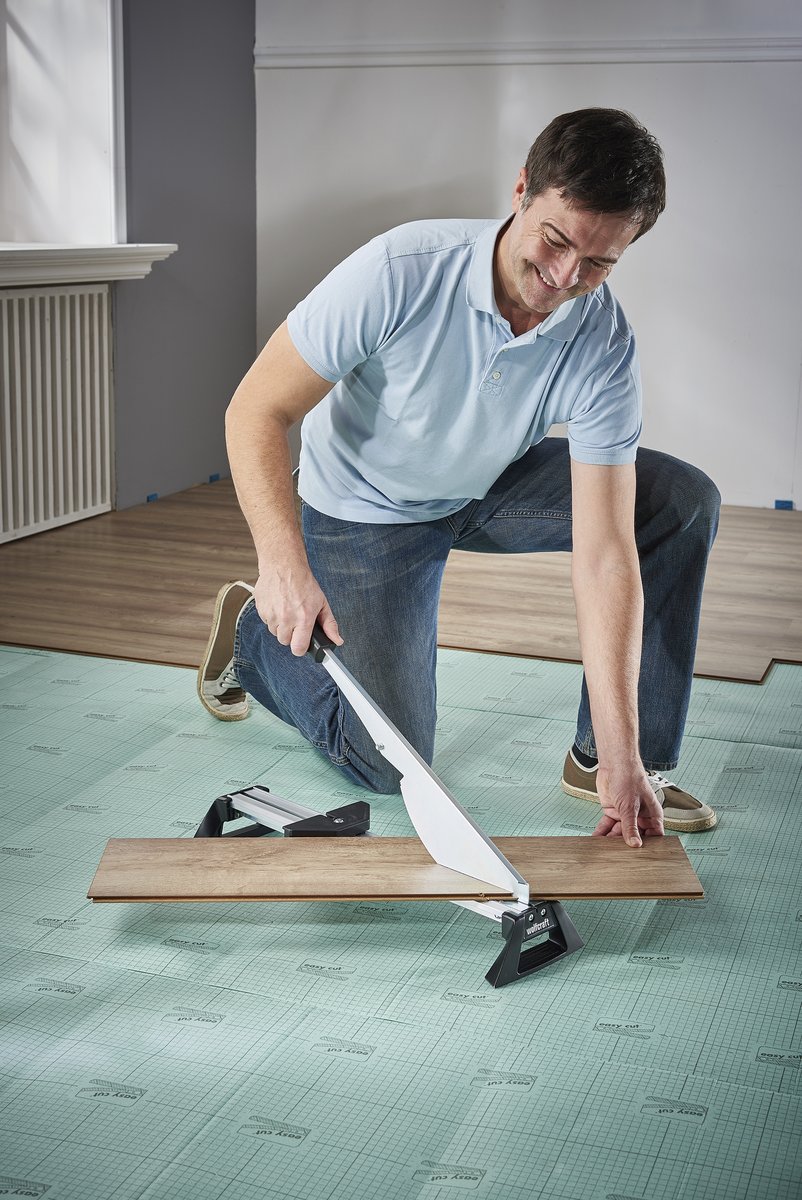
Step 3: Cutting laminate flooring to length
The floor board is then placed in the laminate cutter and the line on the board is aligned with the cutting die. Now press the cutting die down and cut through the board. The board is pressed firmly against the front stop edge and cannot slip during the cutting process.
The blunt edge of the cutting die protects the user from injuries, whilst cutting through the board effortlessly and cleanly. As a result, the cutting edge never needs to be sharpened and is almost wear-free.
Laminate and vinyl cutters
The laminate cutters are a good alternative to jig and mitre saws. They cut laminate and vinyl boards almost silently, without the need for power and without producing any dust.
Step 4: Laying the last board in the row
Insert the cut off board into the groove on the row of boards and start the next row using the remaining piece of the floor board. Note however that the butt joints in adjacent rows must be offset at least 40 cm.
If the remaining piece does not produce this offset, you will have to cut it to length accordingly.
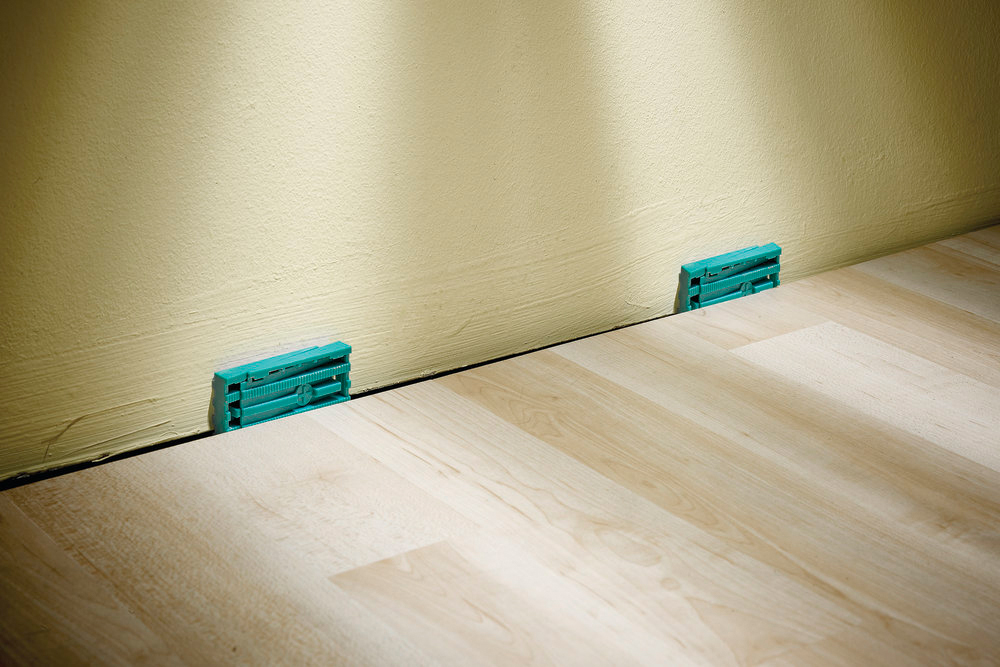
Step 5: Fixing rows of boards with wedges
After the first row has been laid out, you should insert wedges between the ends of the row and the wall to ensure that the space for the expansion joint is retained. The universal wedges are particularly useful here because they can be pushed together to form a larger wedge.
A raster allows you to push several wedges together to achieve the desired thickness. Once inserted and adjusted, the wedges stay in position and retain their thickness.
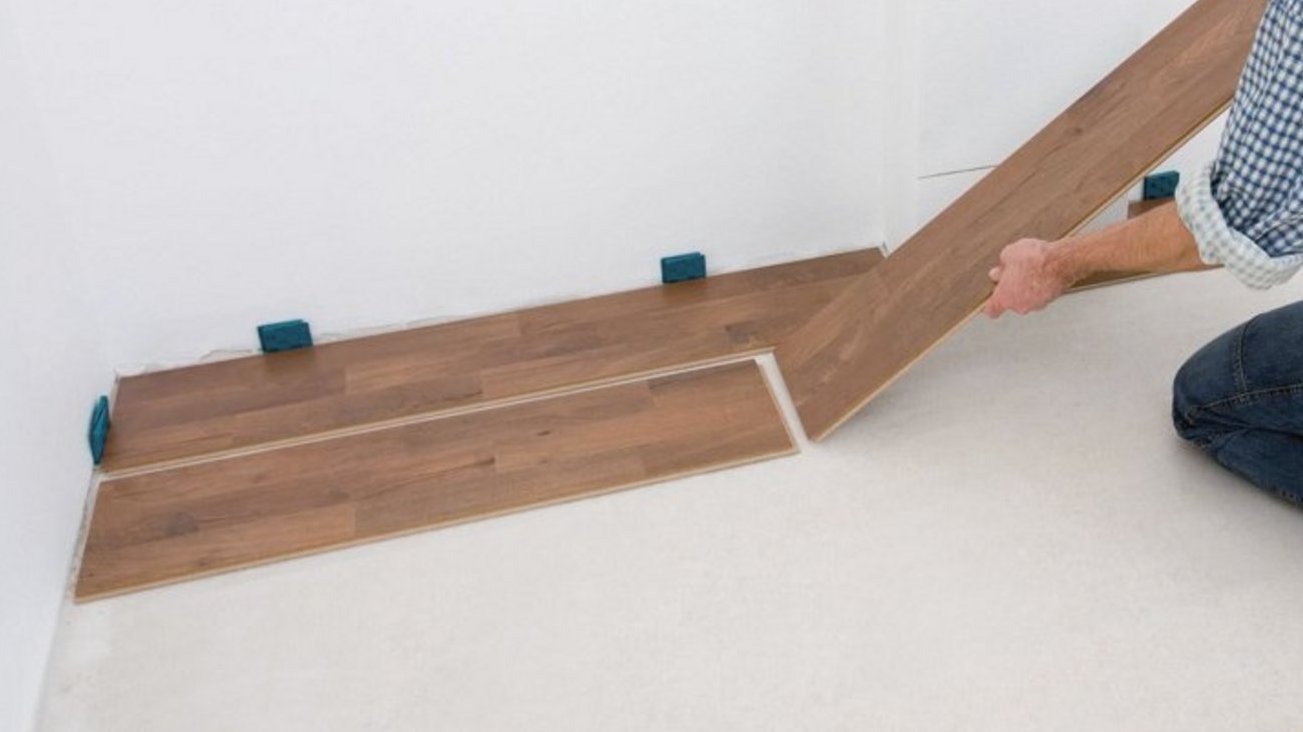
Step 6: Laying the second row of boards
A range of different click systems are currently available, some of which are driven in and some of which are simply inserted and swivelled downward. Essentially, it does not make a difference which system you choose, since all of them have their advantages and disadvantages.
With the click system shown here, the complete next row of boards must be clicked together at the ends before they can be swivelled into the previous row.
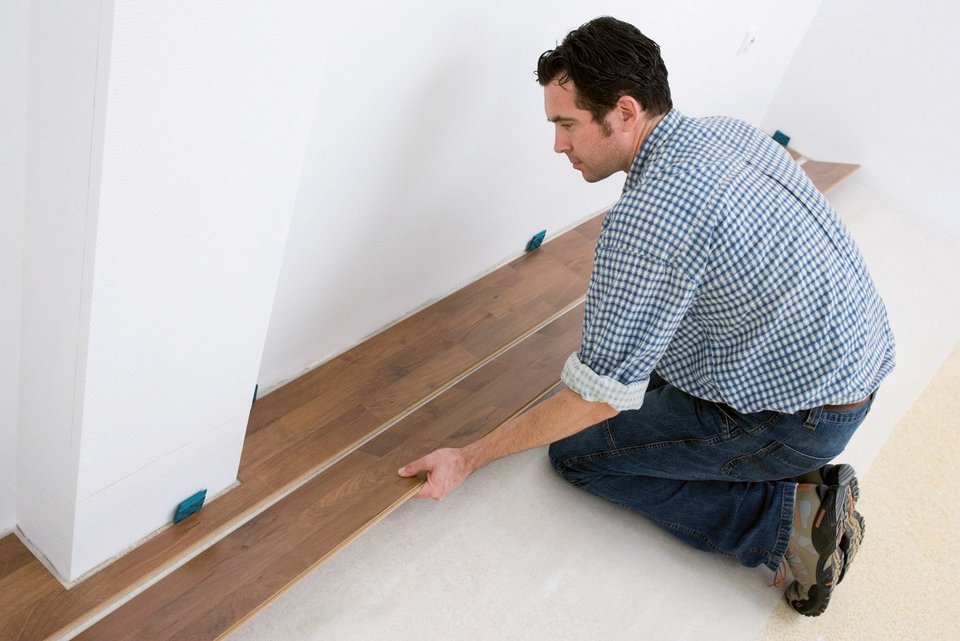
Step 7: Clicking in the second row of boards
Inserting and lowering a complete row of floor boards in a large room is quite laborious for one person to do on their own. You should therefore seek assistance from another person.
However, you do not require a hammer or tapping block when clicking in, which means you do not make any noise and annoy the neighbours.
Step 8: Gap-free join
On some click systems, the components must be adjusted with a hammer and pulling ledge to achieve a gap-free join. You should use the Profi tapping block for this, so that the delicate tongue and groove do not sustain any damage: it transfers the force of the impact evenly across the edge of the laminate while the protective aluminium strip makes it more durable.
Another alternative is to use the hammer pulling ledge, which combines the functions of a hammer, pulling ledge and tapping block in a single safe, ergonomic product. It has never been so easy to lay laminate without gaps – effectively and with control.
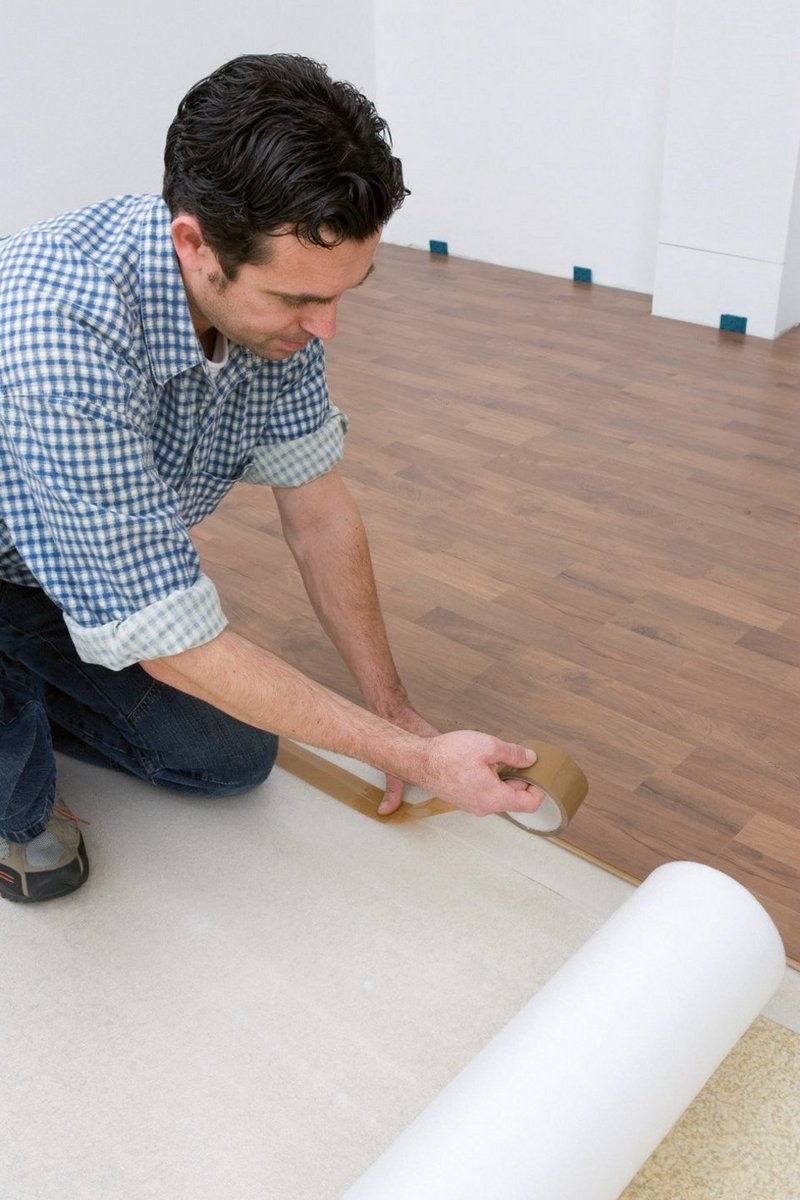
Step 9: Rolling out and fixing additional footfall sound insulation
After you have laid the flooring almost to the end of the first footfall sound insulation row, the next insulation row is rolled out. It is imperative that you fix the butt joints with adhesive tape so that the insulating strips cannot be pushed over one another.

Step 10: Fast sense of achievement
In no time at all, you will get a first impression of your new dream floor. You will be amazed at how fast you have laid the flooring. Motivated by this sense of achievement and the clever laying aids from wolfcraft, the rest is merely a formality.
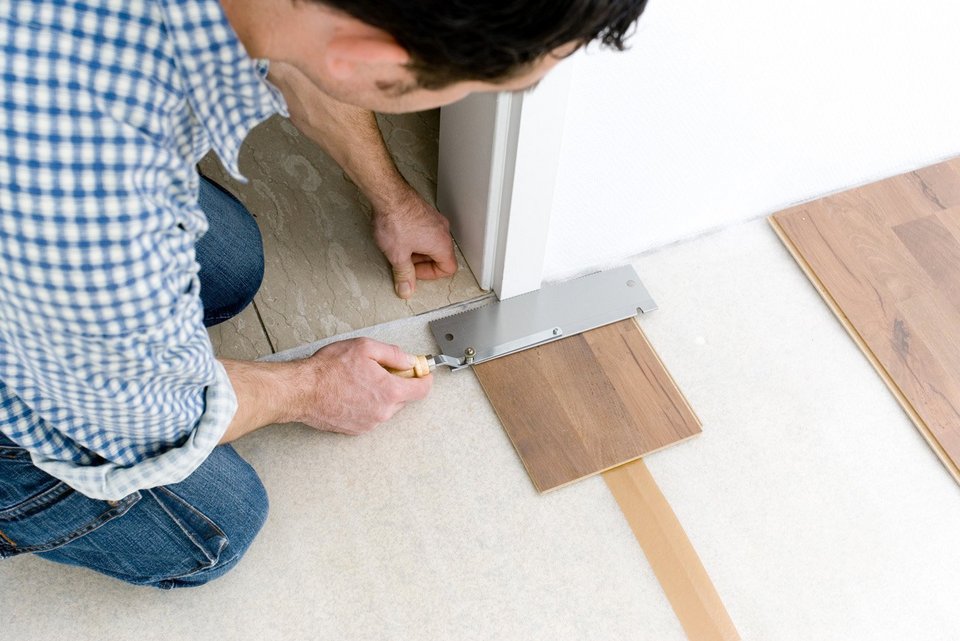
Step 11: Shortening the door frame
The door frame must be shortened to match the board thickness. Take a cut-off of a floor board and place it in front of the door frame.
Guide a handsaw with an offset handle over the floor board until the door frame is completely cut through. Finally, you may need to rework a little with the chisel.
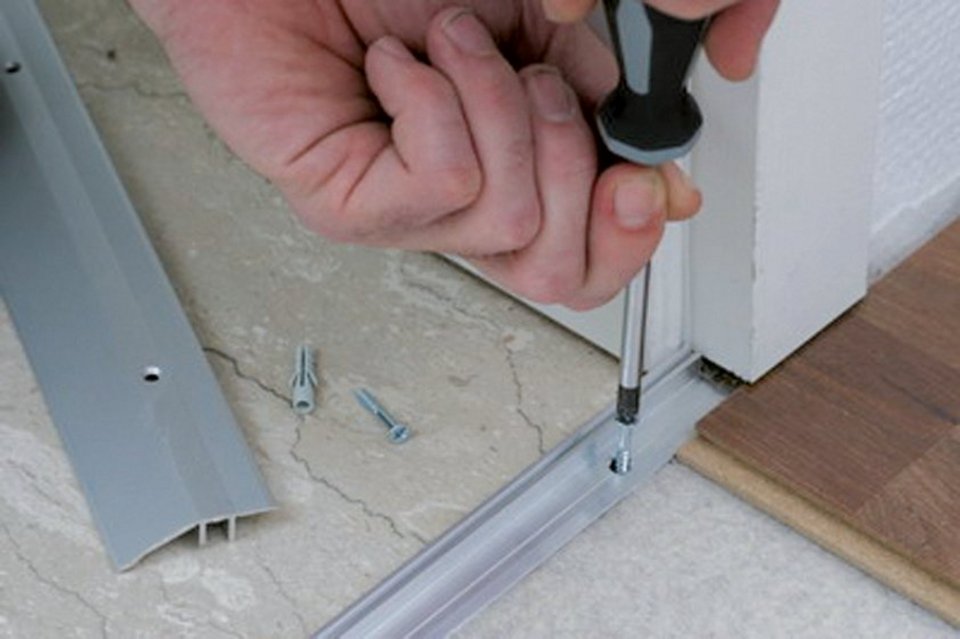
Step 12: Screwing on the compensating profile
There is normally a slight difference in height in the door area leading to the neighbouring room, which corresponds to the laminate thickness plus the thickness of the insulation. It is imperative that you eliminate this trip hazard with a compensating profile.
The bottom floor rail is affixed directly to the screed floor before the flooring is laid on top of it (maintain 10 mm expansion joint!). Finally, the chamfered compensation profile is screwed onto the floor rail.

Step 13: Transition profile for large rooms
You should not only place a transition profile between two rooms; expansion joints must also be integrated into rooms that are longer or wider than 8 m.
The trade supplies various profile types made either of metal or the wood type matching the floor.
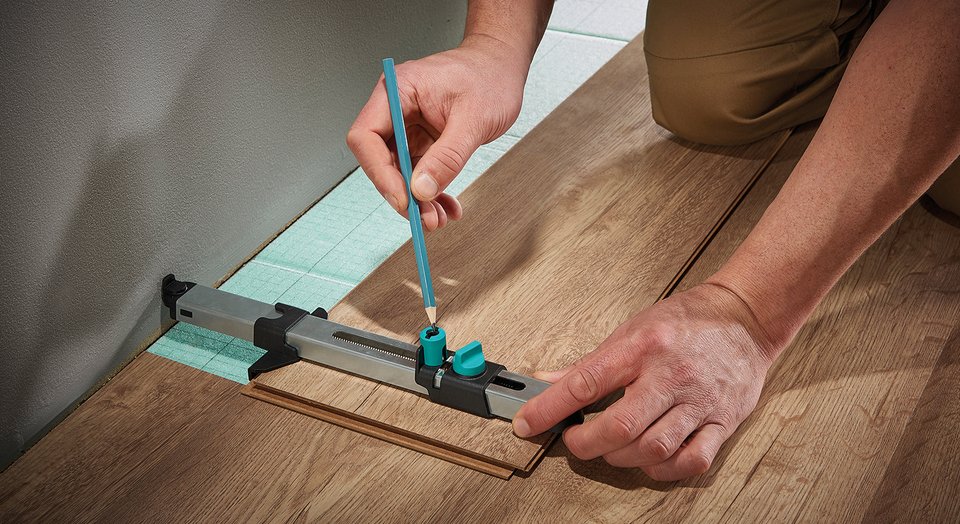
Step 14: Measuring the last row of boards
The last row of boards should be no narrower than 5 cm. You should also leave space for a 10 mm expansion joint here.
If you mark the last row using the laminate fitter, you do not have to think about the expansion joint as the device automatically takes it into account. Every wall contour is transferred perfectly to the floor board, no matter how complicated it is.
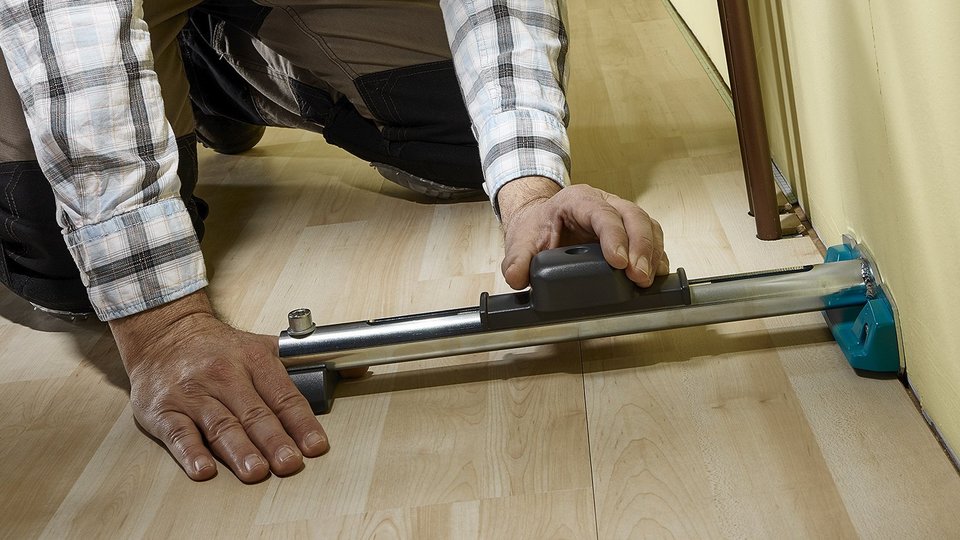
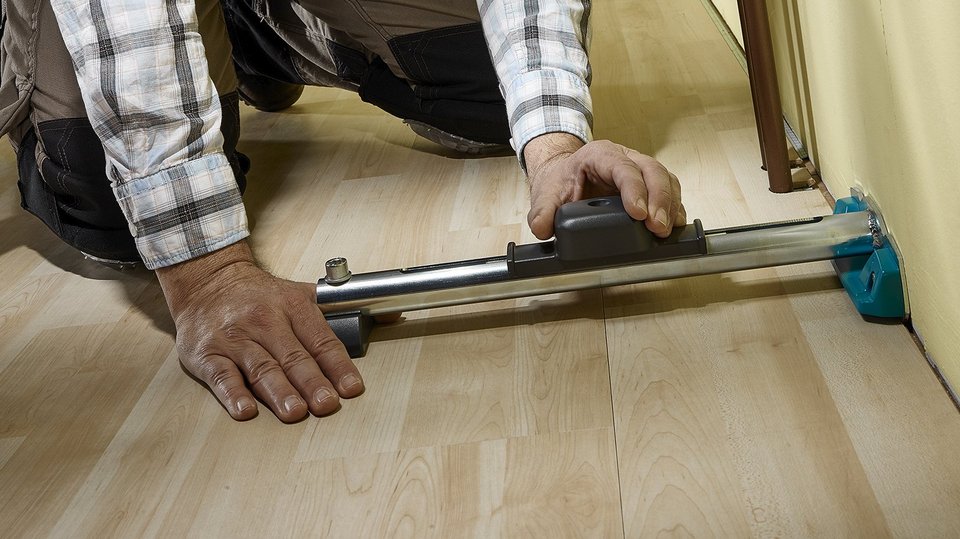
Step 15: Fitting the last row of boards without leaving gaps
The last row of boards should be no narrower than 5 cm. You should also leave space for a 10 mm expansion joint here. If you mark the last row using the laminate fitter, you do not have to think about the expansion joint as the device automatically takes it into account. Every wall contour is transferred perfectly to the floor board, no matter how complicated it is.
Our hammer pulling ledge makes sure the last row of boards is fitted without any gaps. It is simply inserted in the expansion joint and the cradle is drawn vigorously towards the stop.
The force of this guided hammer impact is now transferred evenly across the entire width of the pulling ledge to the board adjacent to the wall, which is joined seamlessly with the flooring already laid. The product is height-adjustable and suitable for all laminate thicknesses from 7 mm.
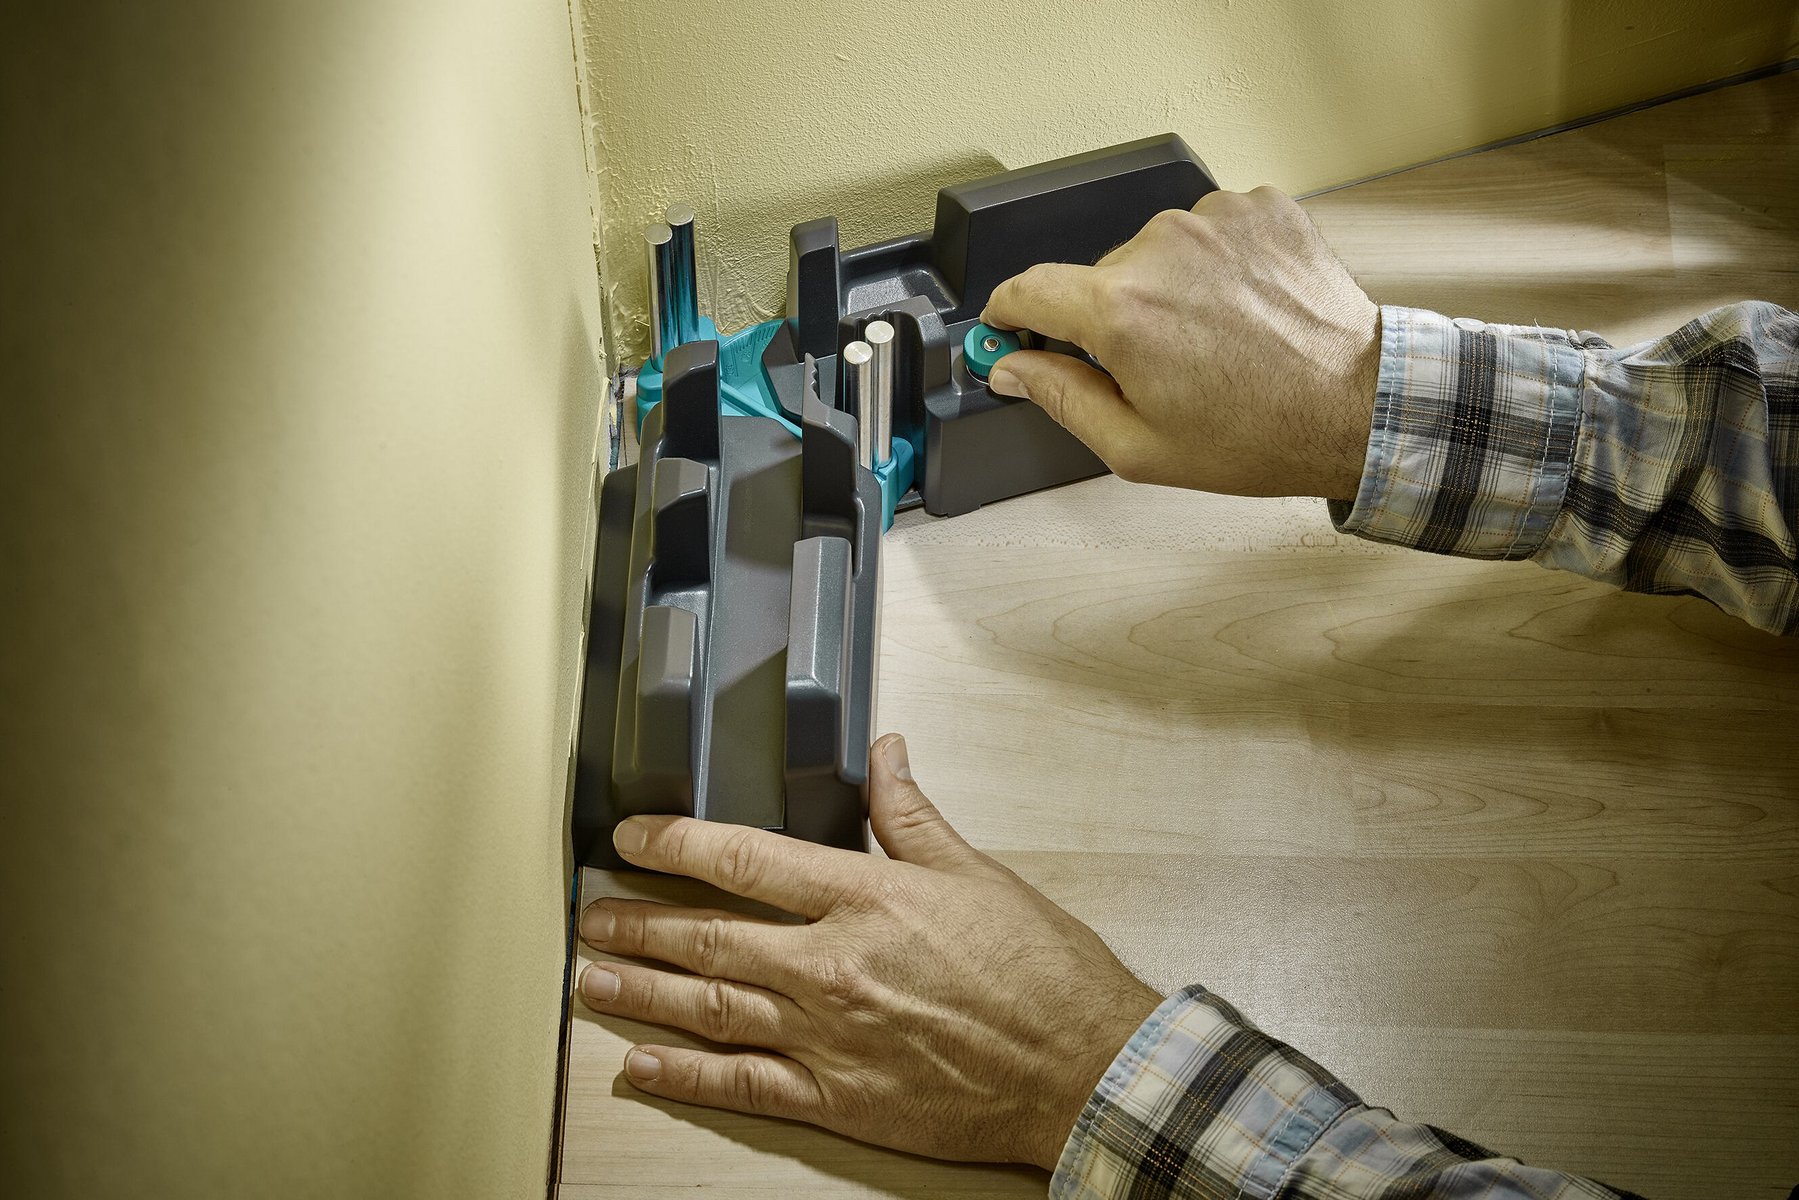
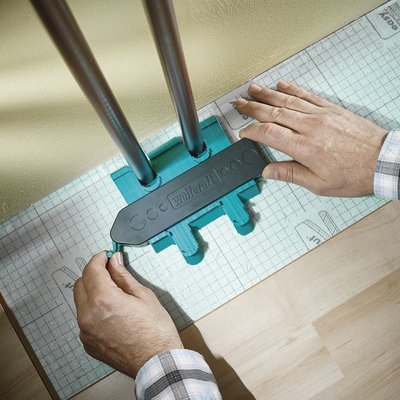
Step 16: Measuring the mitre joint of the skirting boards
It's best to leave this fiddly job to our bevel and mitre box. You can use it to measure and cut all room corners from 85° to 180°.
Simply place the bevel in the corner of the room until both of the legs are firmly positioned against the wall. Now lock both legs in position with the set screw.
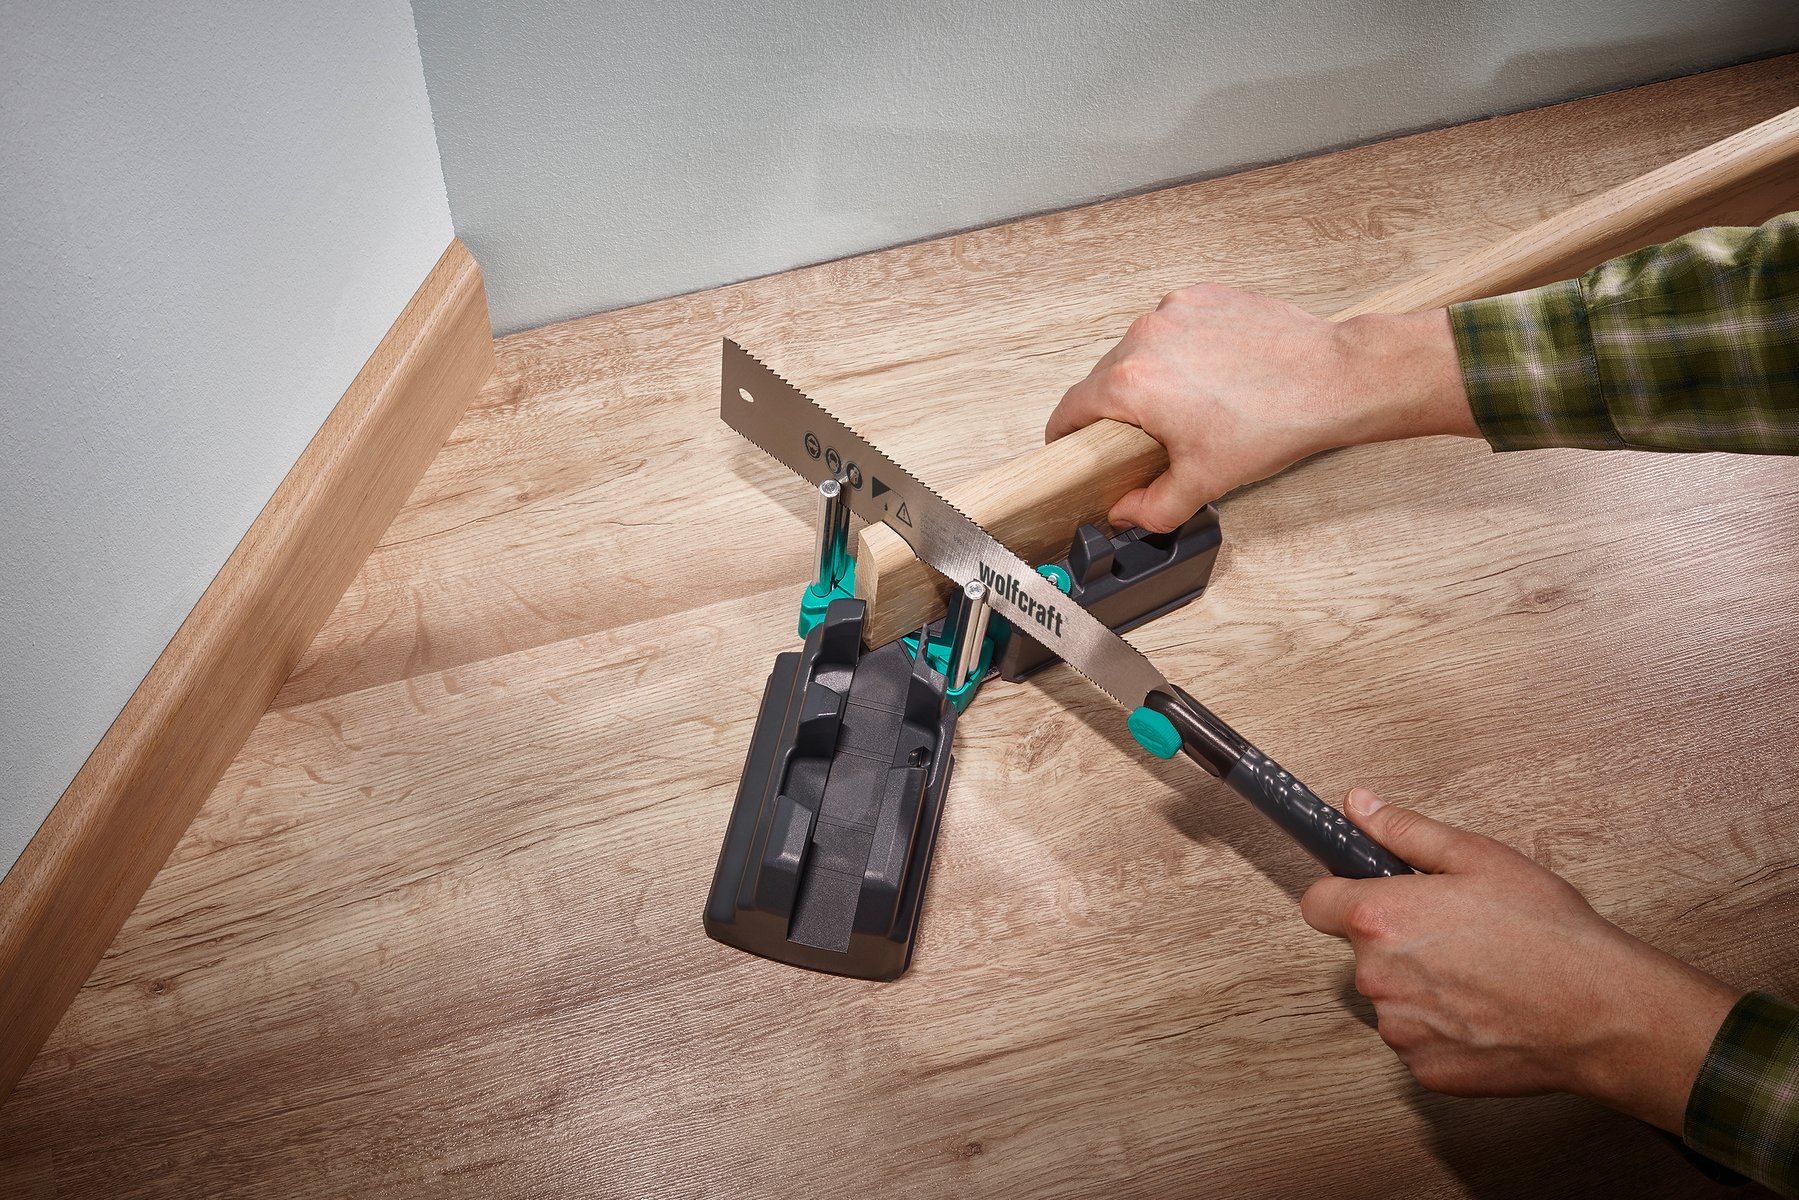
Step 17: Mitre-cutting the skirting boards
With the bevel and mitre box, you can leave your mitre saw in the tool cabinet. A simple fine handsaw is usually enough. For high and wide baseboards where smooth and precise cuts are required, we recommend our Japanese saw.
Place the skirting boards on the guide surface of the left and right leg of the preset bevel and mitre box. Then guide the handsaw vertically between the two guide pins. You can master complicated room cross-sections in next to no time without making any expensive miscuts.
PDF instructions to download

Other Projects
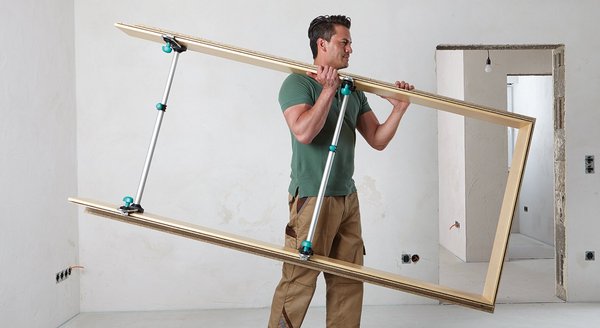
Installing Doors
Our tools make installation so easy that even inexperienced DIYers can approach this task with confidence.
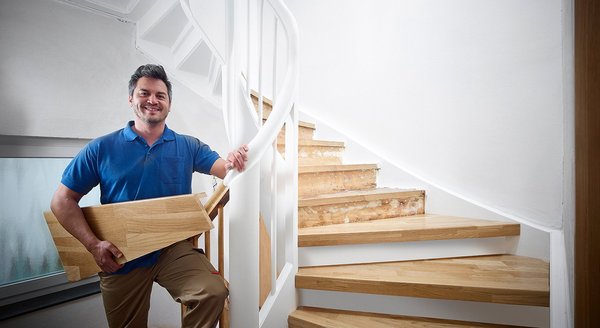
Renovating Stairs
Save several thousand euros when renovating your old wooden stairs. Our stair gauge delivers perfect results.


