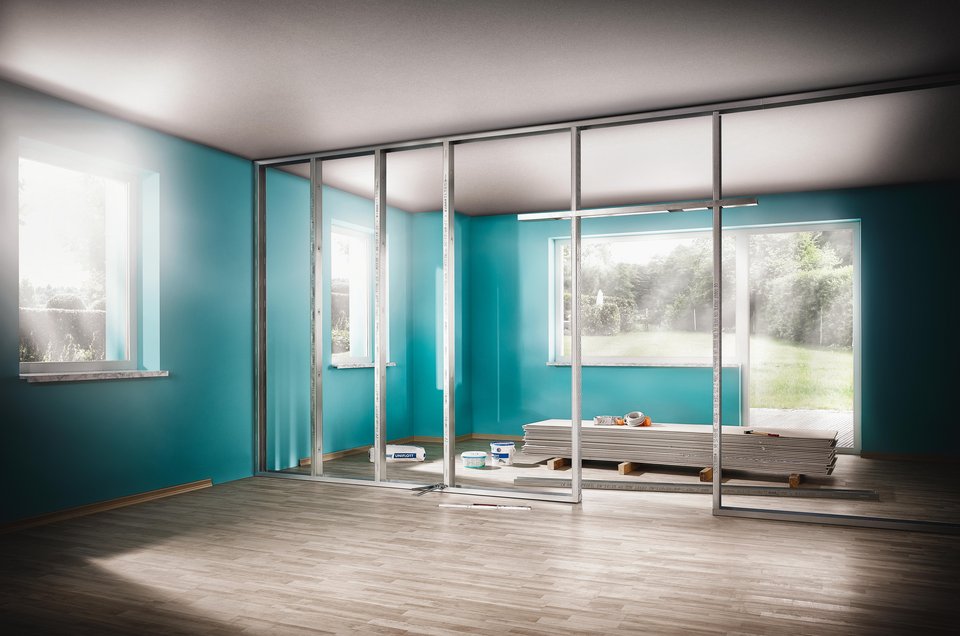
Need a New Nursery or Space for a Home Office?
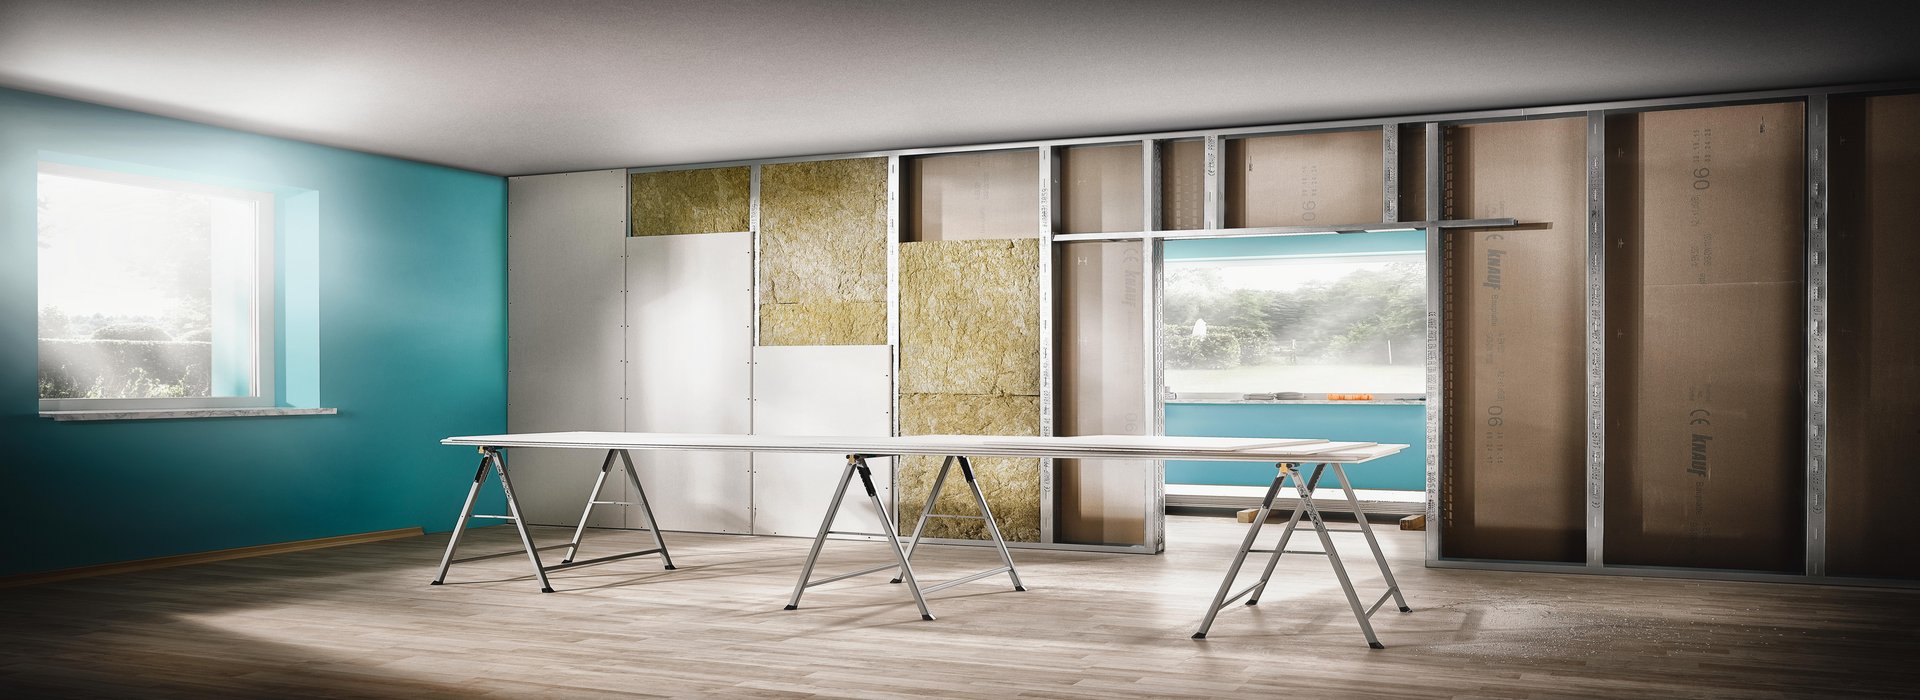
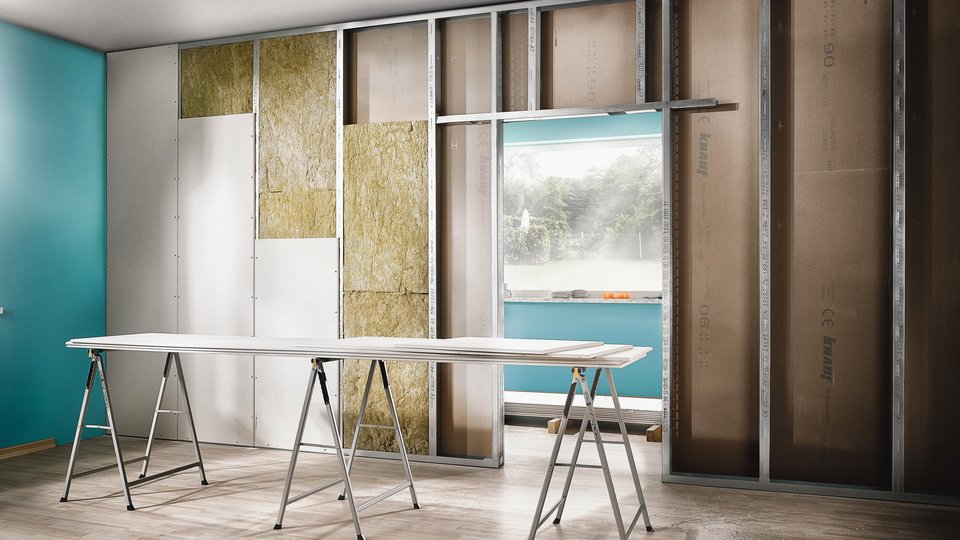
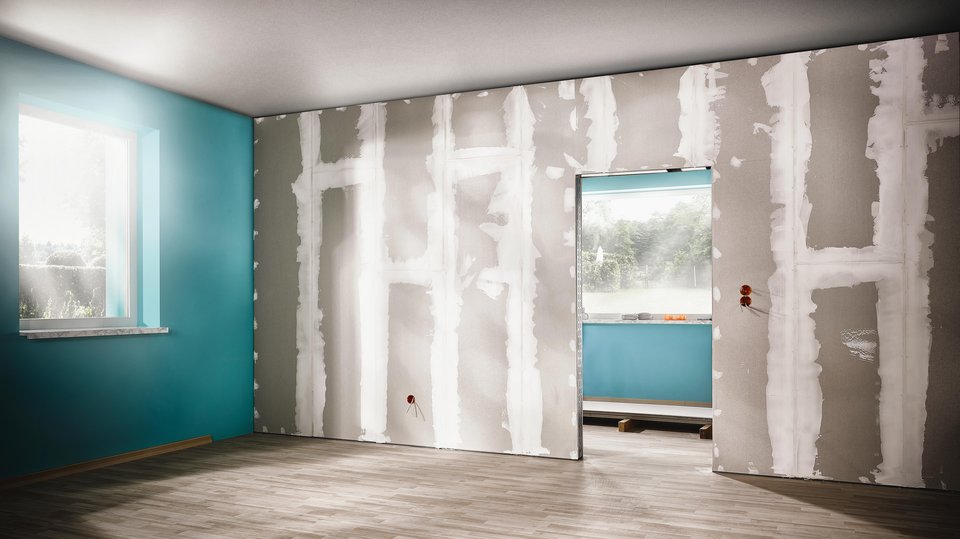
Installing drywalls with stud frames and gypsum plaster boards is a quick and easy way of extending and converting the space inside your own four walls without interfering with the structure of the building.
Using well thought-out solutions, you can complete interior construction projects and achieve the desired results at the first attempt, even if you have very little experience.
We will guide you through every step of the project and explain all the important details that you need to know to install drywalls and work with gypsum plaster boards.
Contents
- Step 1: Planning & Measurement
- Step 2: Tools & Accessories
- Step 3: Building the Substructure
- Step 4: Cutting Gypsum Plasterboards
- Step 5: Positioning the Boards
- Step 6: Cladding
- Step 7: Integrating Installations
- Step 8: Filling and Smoothing Joints
- Step 9: Sanding
- Downloads: Step-by-Step Guide and Shopping List for Tools
Instructional Video
Step 1: Planning & Measurement
Good preparation
Use a plumb line or laser to mark the outline on the floor and transfer it to the walls and ceiling using a spirit level. Measure your wall and calculate the material quantities. Include approx. 10 % extra.
You can find numerous quantity calculators on the internet to help make calculations easier. Buy all materials in the required quantity so you don't have to stop halfway through. Ensure that the gypsum plaster board you purchase is stored horizontally in a dry location to prevent warping.
Before starting, have a look at our checklist to make sure you have all the right tools available at the right time and don't have to interrupt your workflow.
Attention: Sockets and underfloor heating
I. When planning, make sure that sockets and switches are not positioned directly opposite one another on either side of the partition wall. For reasons of fire protection, make sure that the distance between them is at least the equivalent of the space between two vertical studs.
II. Is underfloor heating installed in the area where you intend to secure the stud frames to the floor? If so, ask the installer whether it is possible to drill holes in the floor or alternatively bond the stud frames to the floor using a suitable construction adhesive. Otherwise you run the risk of damaging the heating coils.
III. Are you planning to install large doors? If the doors are more than 90 cm wide or weigh more than 26 kg, you should use the more rigid UA stud profiles in the substructure in place of the standard CW stud profiles.
Step 2: Tools and Accessories
Good tools are essential for achieving perfect results. Our recommendations will provide you with an initial indication of which useful tools and accessories you will need to complete your drywall project successfully. Start with choosing quality products manufactured based on years of experience in development – products you can trust for enhanced productivity and maximum safety.


Selecting the right materials
A stud frame can be built from wood or metal. Gypsum plaster boards are then screwed to the frame.
Today, metal is the material of choice in almost every application. It offers greater dimensional accuracy, is easier to process and has a higher load-bearing capacity.
You can find the most common standard metal profiles at DIY stores:
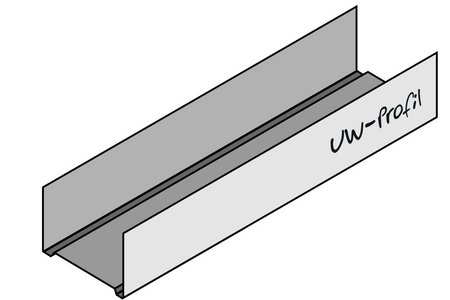
UW profiles for the floor and ceiling
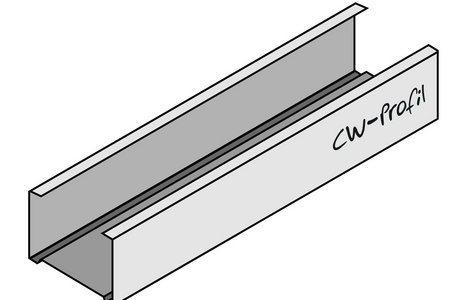
CW profiles for the sides and vertical struts in the centre
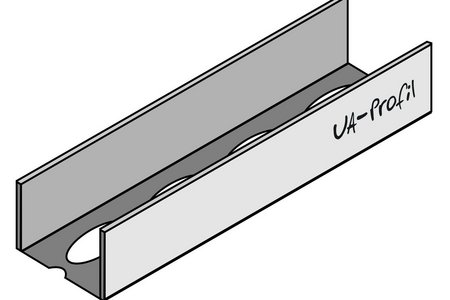
UA profiles and door lintel profiles for doors and passageways
Step 3: Building the Substructure
Preparing the working area
Before you can start work, you should set up a tape & zip door:
Simply secure the extra strong transparent sheeting to the door frame using the enclosed adhesive tape, cut into the sheeting on the back at the relevant point, attach the self-adhesive zip fastener and the tape & zip door is ready to use. After you have finished the work, you can remove the adhesive tape cleanly from the door frame, saving you cleaning work and energy. Everything prepared? Then let the work begin!
3.1. Marking out the wall profile
Mark the profile of the planned wall using a plumb line or laser and measure the UW profiles accordingly. For better orientation, use adhesive strips to mark out the outline on the floor.
3.2. Preparing the profiles
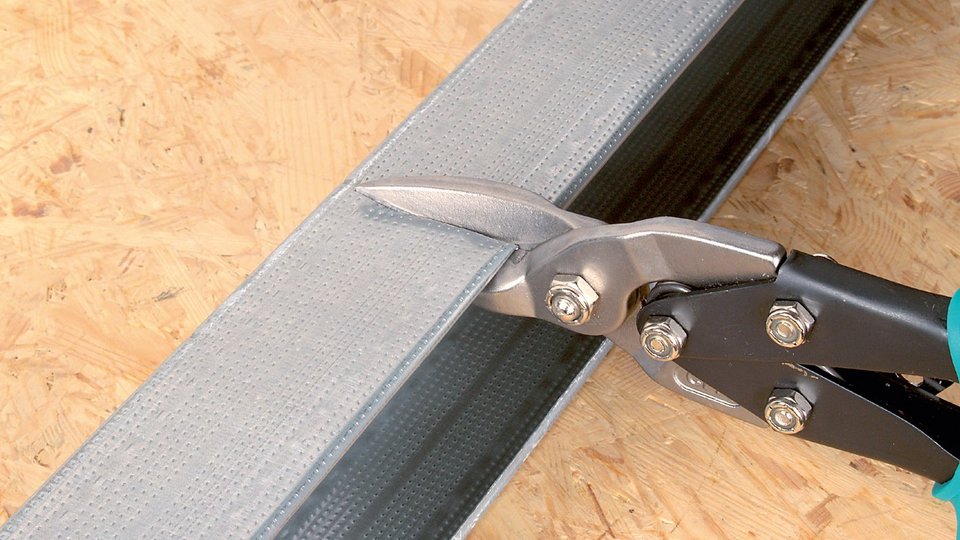
Use metal shears to cut the profiles to the required length. Do not use an angle grinder because the high frictional heat will destroy the corrosion protection layer on the profiles.
3.3. Securing the UW profiles
You can now secure the profiles to the floor and ceiling using suitable screw plugs. Use a drill fitted with a suitable drill and corresponding bit. If underfloor heating is installed, you should bond the profile in position or use a cable finder to make sure there are no pipes or cables in the area where you are drilling. The bottom UW profiles are recessed in the area where the door opening will be. A joint seal is affixed to the stud profiles on the walls. Secure the profile according to the manufacturer's specifications.
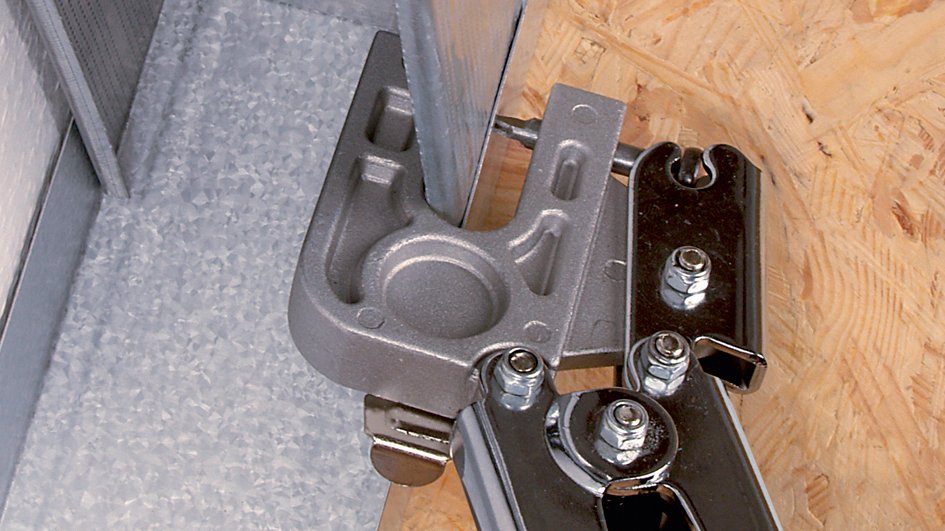
3.4. Aligning the CW profiles
You can now position the first CW profile in the UW profiles secured to the floor and ceiling without attaching it permanently. You should allow 2 cm of clearance to compensate for any ceiling movements.
Starting from the wall, you can now align the stud profiles so that the distance between them is half the width of the gypsum plaster board. Align all profiles in the same direction and then crimp them using profile compound pliers from wolfcraft, for example.
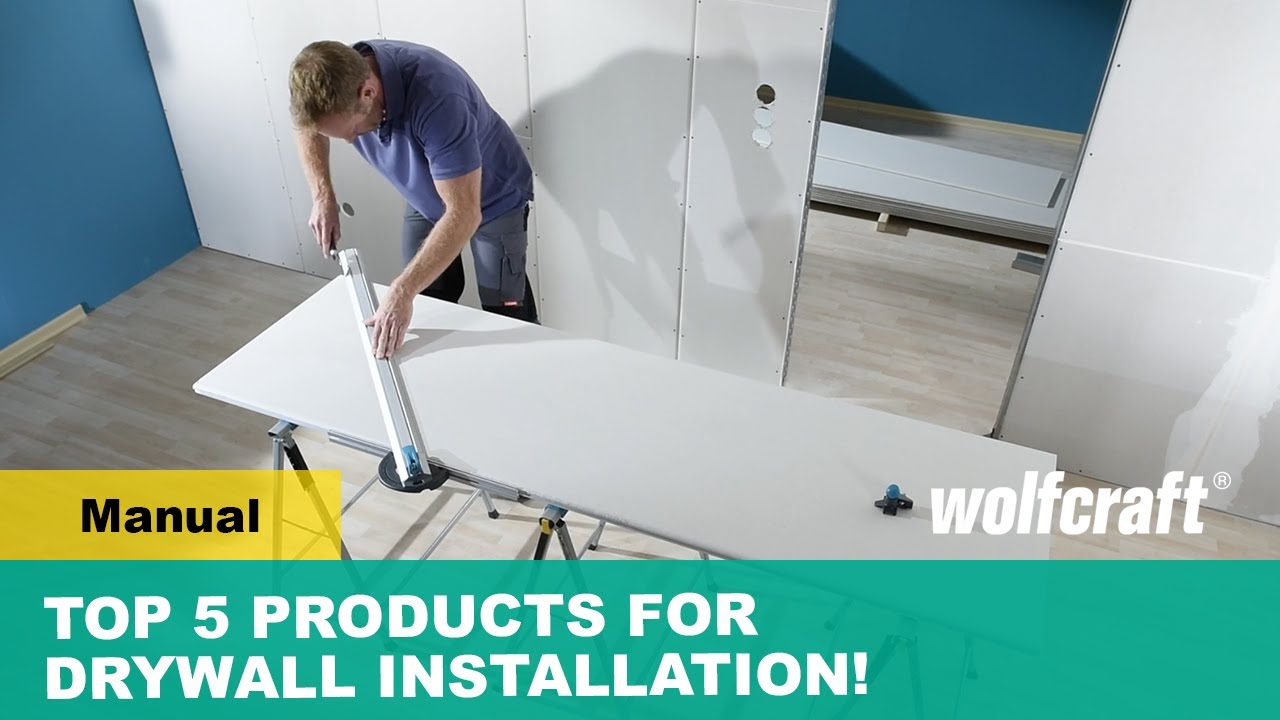
Step 4: Cutting Plasterboard
Gypsum plaster board is the unrivaled material of choice for wall and ceiling cladding: It offers excellent value for money, optimal fire protection and is easy to work with using the right tools.
Gypsum plaster board comprises a plaster core covered with a special cardboard on both sides. For interior construction, we recommend the ceiling-high format with a width of 125 cm or "one man boards" in 60 x 260 cm format. For damp rooms, you should use impregnated boards specially designed for bathrooms.
This guide presents two practical alternative tools for cutting and adapting gypsum plaster board.
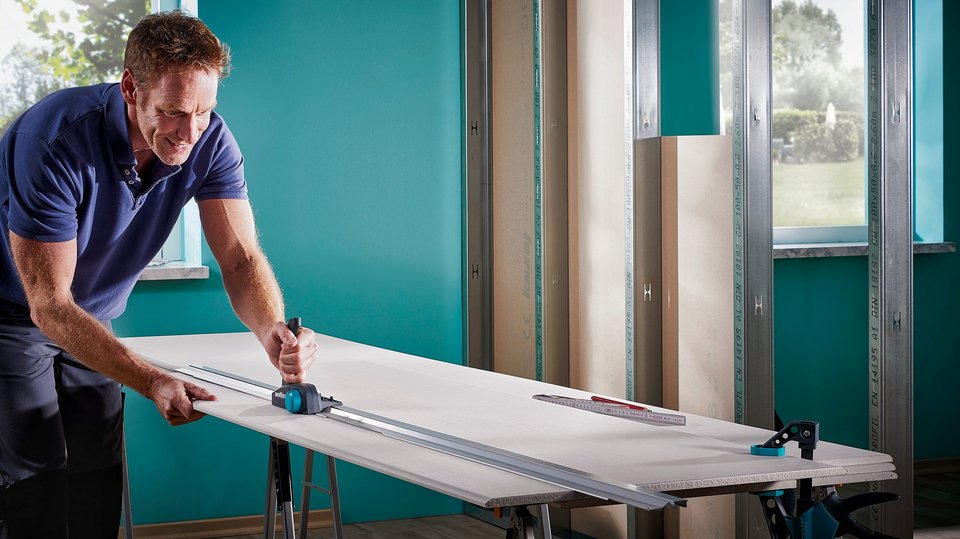
4.1. Cutting plasterboard in 3 steps
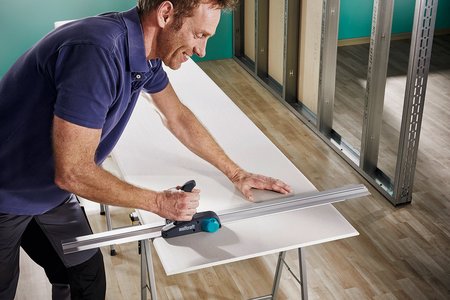
1. Using the plasterboard cutter
Simply place the 100 cm long rail on the board and draw the carriage with cutting blade across the cardboard.
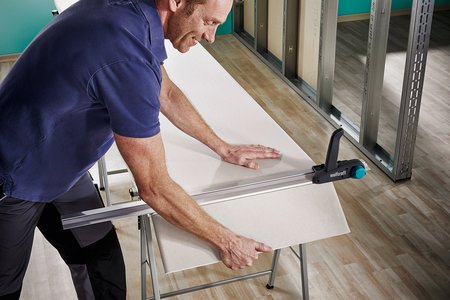
2. Break the scored plasterboard by applying gradual, controlled downward pressure. Please do not strike the board as it is important that the layer of cardboard remains intact.
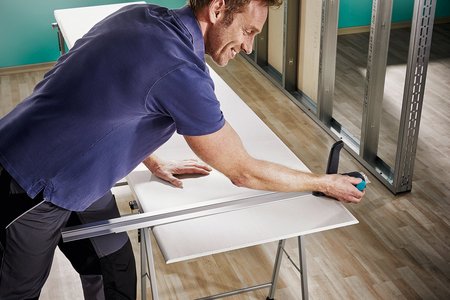
3. You do not have to change the position of the board to cut the cardboard on the back. One working step less to perform! Simply slide the carriage in the opposite direction; the integral hook blade will then cut the second cardboard layer cleanly on the way back.
Result
The clean cut will make subsequent jointing work much easier. The interchangeable standard blades are very quick to replace.

4.2. Making precise angular and longitudinal cuts
The new moving T-square with angle function guarantees precision cutting at exactly the right angle. You can mark out and make cuts accurately using the easy-to-read scale.
The accompanying parallel and strip cutter with trapezium blade can be locked easily on the cutter carriage, enabling you to make a series of guided cuts.

4.3. Efficiently removing unevenness along edges
You can remove any unevenness along edges using the robust one-handed planer. The ergonomic handle enables you to guide the planer conveniently with just one hand. The 150 x 57 mm rasp surface guarantees rapid working progress,
making your work really fun!
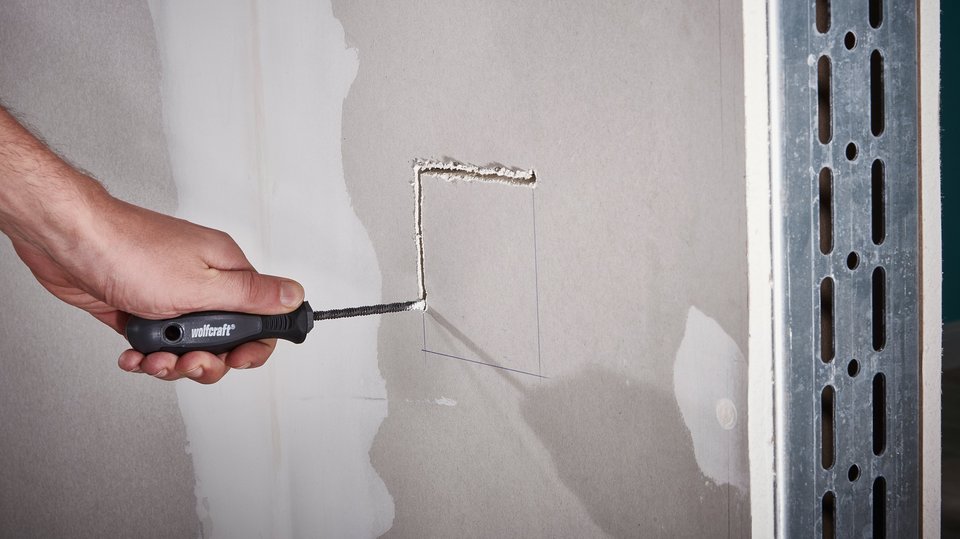
4.4. Cutting recesses, circles and free forms
You can now cut larger holes or recesses before attaching the gypsum plaster board to the wall. Circular shapes and free forms can be cut quickly and conveniently by hand using the keyhole saw for board material.
The ergonomic two-component handle and 17 cm long, 5 mm thin shaft with all-round teeth make the saw easy to guide and the tool is the ideal length for use on drywalls.
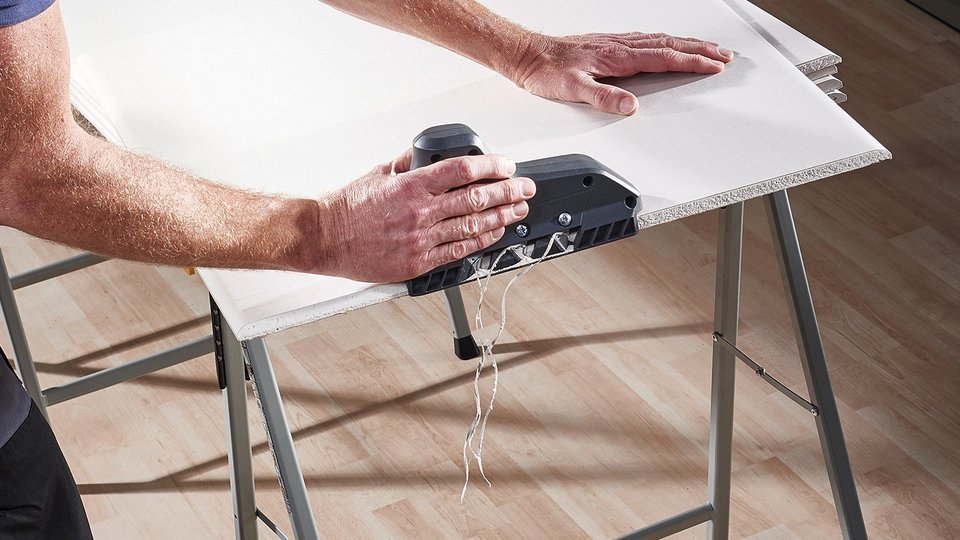
4.5. Chamfering face edges cleanly
The boards must be chamfered so that the boards are not simply positioned end to end, but form an expansion joint that prevents the formation of cracks. This requires precision and finesse. No problem with the new triple-blade edge planer.
Even inexperienced DIYers can safely manufacture angled edges in seconds. Simply place in position, draw along the piece of 9.5 or 12.5 mm plasterboard and you're done.
The triple blade produces an accurate 35° angle in a single step with fine, clean-cut edges that can then be plastered over quickly without damaging the material. The commercially available blades are loosened easily via three screws and are straightforward to replace.
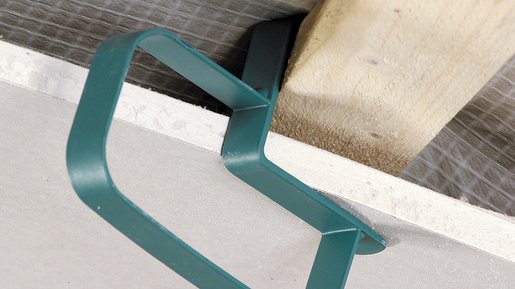
Step 5: Positioning the Boards with the Aid of Universal Wedges and Fixing Set
The stud frame has been erected, the gypsum plaster board cut to the correct dimensions and the wall is slowly taking shape. You should provide a gap below the plasterboard adjacent to the floor. Universal wedges from wolfcraft are a worthwhile investment that will pay dividends in countless situations such as this.
Spacers to the wall
The patented universal wedges offer no less than three significant benefits: they always remain in position and can be plugged together in any combination, while their flexible format makes it possible to use them either as a wedge or spacing guide. Use the wedges as spacers to the wall and carefully align the gypsum plaster boards.
Installing plasterboards overhead while working alone
An extra helping hand is needed in particular when installing ceiling boards - and once again, we have the perfect aid for you: The gypsum plaster board fixing set helps you install plaster boards overhead while working alone.
The tools and clamps ensure convenient, easy and safe installation on walls, ceilings and especially on inclined surfaces.
The boards are fixated and then screwed in position using fixing clamps and crosses. The fixing material is then removed and can be used for other boards.
The ceiling support from wolfcraft also offers welcome relief when installing larger boards on ceilings and inclined surfaces. The telescopic support covers distances of 1.6 – 2.9 m, can support weights of 30 kg and features a pump mechanism for making fine adjustments.
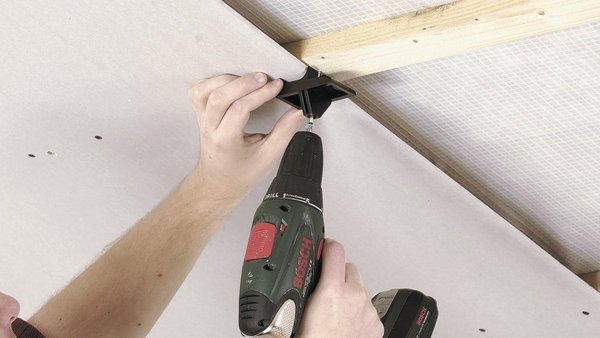
Step 6: Cladding
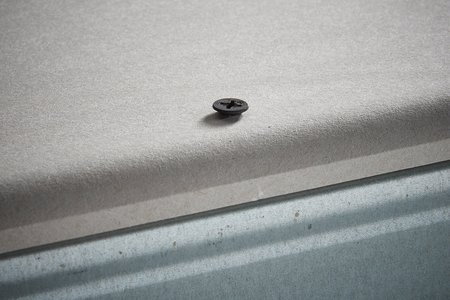
Fasten the gypsum plaster boards to the metal profiles using fine thread quick-fit screws.
The screw heads should be countersunk slightly so that they can be plastered over easily at a later stage. Caution: Do not drill too deep, otherwise you will damage the cardboard layer and the screw will no longer grip properly.
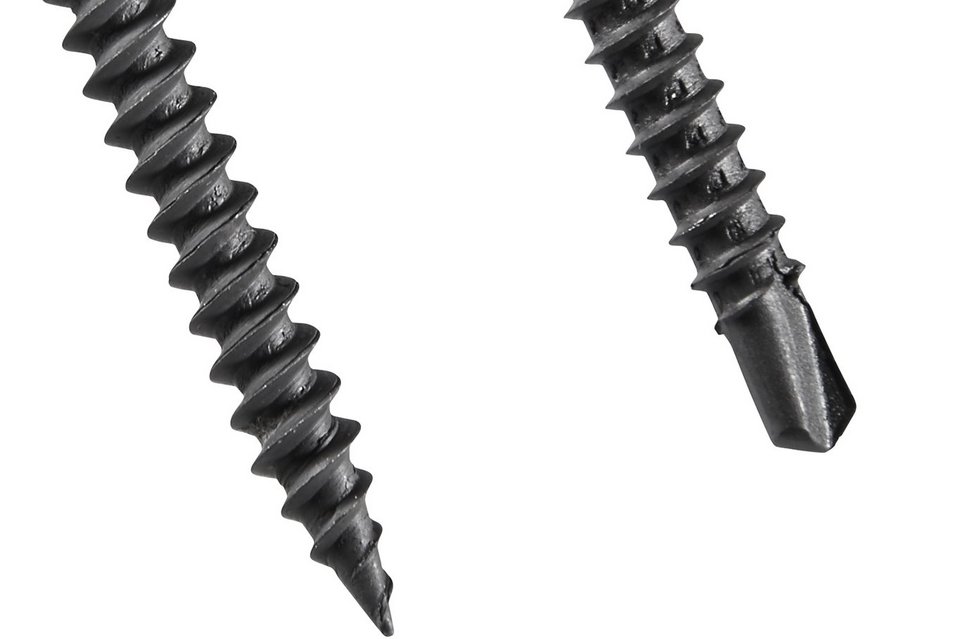
Getting the Screw Connections Right
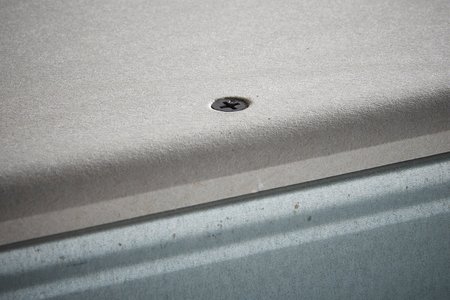
Perfect insertion depth
Screw not deep enough
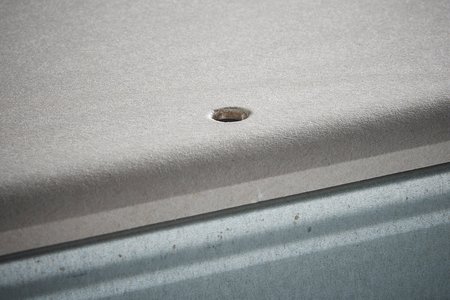
Screw too deep

Automatically get the depth right
If you want to be absolutely sure: The automatic plasterboard screwdriver attachment is the ideal solution, because it provides the right degree of finesse needed to get the depth just right. It is compatible with all standard cordless drills and can countersink all common plasterboard screws to the correct insertion depth in metal profiles and square timber – no matter how long they are, what thread they have or if they have a drilling tip.
Positioning the boards
Before securing the boards, you should make sure that they are positioned at an offset to avoid cross joints. We suggest starting the second row with half a board, for example.
Walls that do not need to withstand heavy loads can simply be covered with a single layer of plasterboard. A double plasterboard layer is recommended on walls that will be tiled at a later time. In this case, two boards are secured on top of one another.
Step 7: Integrating Installations
The cavities between the metal profiles provide space for installation cables and insulating material. The installation zones should be considered right from the start when planning the drywall. It is possible to deviate during the lightweight construction, but proper planning helps you to maintain an overview and ensures that you do not accidentally drill into the cables later on.
You can insert the electrical cables before closing off the second side of the drywall. Bend open the holes already cut in the metal profiles and guide the cables through.
7.1. Positioning electric sockets and switches
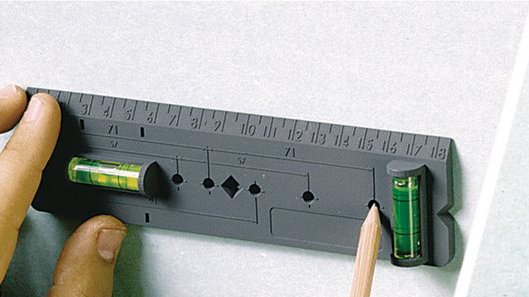
Before cutting out the openings for the sockets and switches, you must determine their exact position. This is where the template for hollow wall boxes comes in handy. You can use the template to mark the positions of all standard socket and switch combinations.
The vertical and horizontal spirit levels help you adjust the template with greater precision. You can transfer the spacing of all standard sockets to the wall instantly using the marking points on the template. You can also determine the correct distance between a switch and the door frame quickly and conveniently using the integral scale.
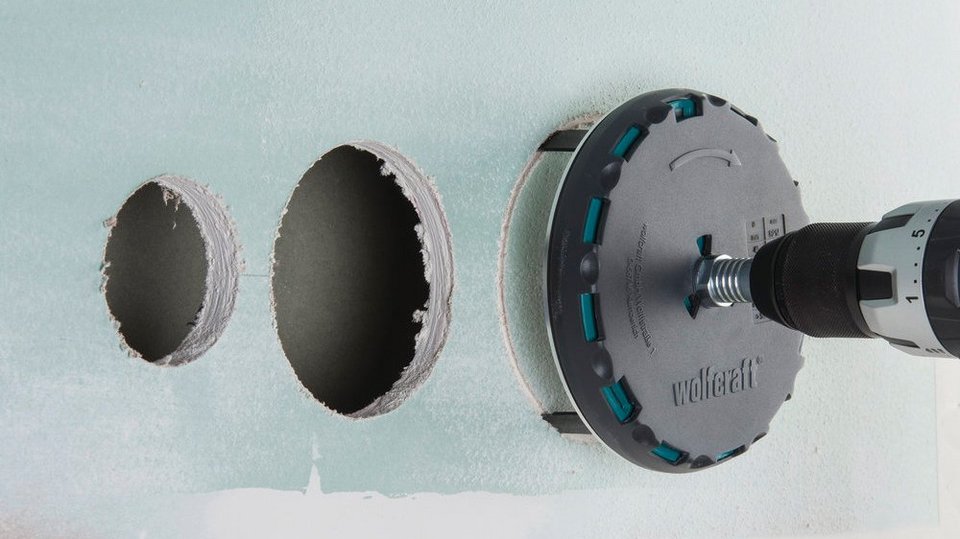
7.2. Drilling recesses
Time for the step two: The appropriate recesses in the plasterboard wall can be drilled with the Ø 68 mm carbon steel hole saw. The saw has a special tooth geometry so you can also cut accurate holes in wood, plywood and MDF boards.
The adjustable AH 45 – 130 hole saw is particularly well suited for further installations. Its continuous adjustment from 45 – 130 mm enables holes of all the necessary diameters to be drilled during installation work.
Step 8: Filling and Smoothing Joints
Congratulations, the basic wall structure is now complete. Time to add the finishing touches. You can now fix any minor flaws and repair local damage to the boards.
However, you should only perform this step once you are sure that the gypsum plaster board will not change its shape due to heat or moisture from freshly laid floor screed or other plasterwork, for example. If you do not expect the plasterboard to change shape, you can begin.
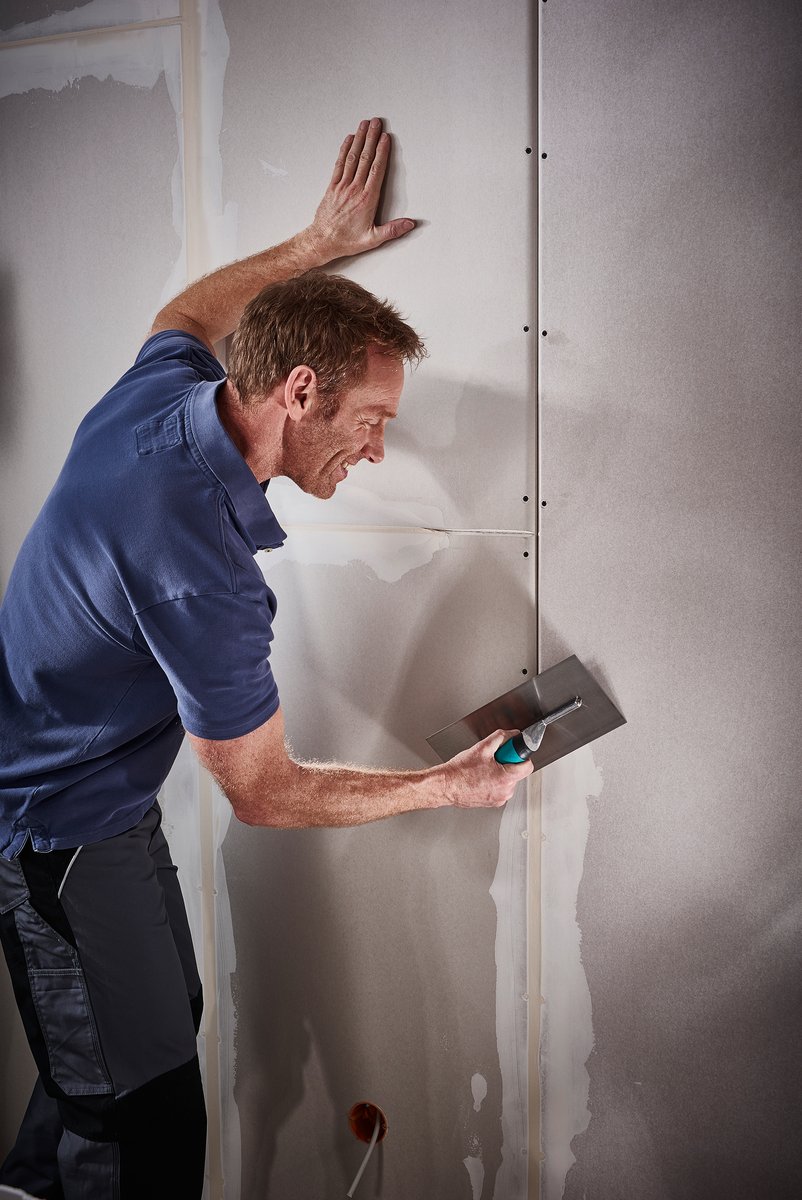
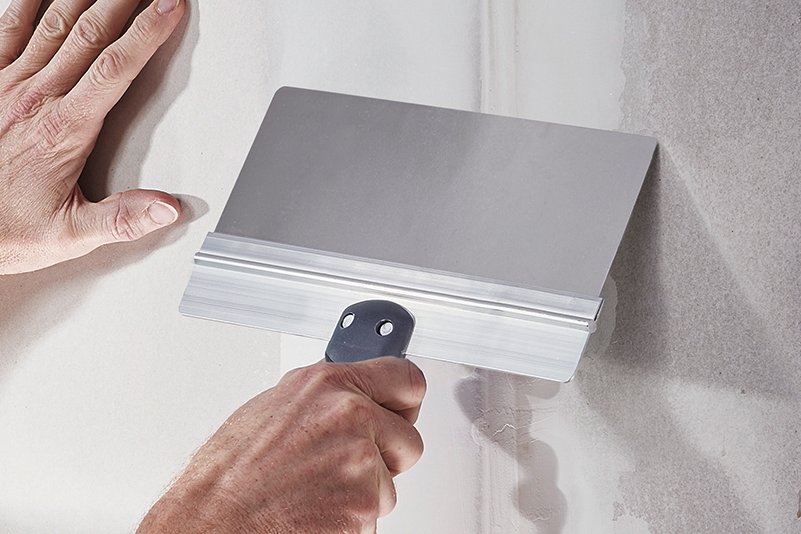
Filling holes and removing unevenness
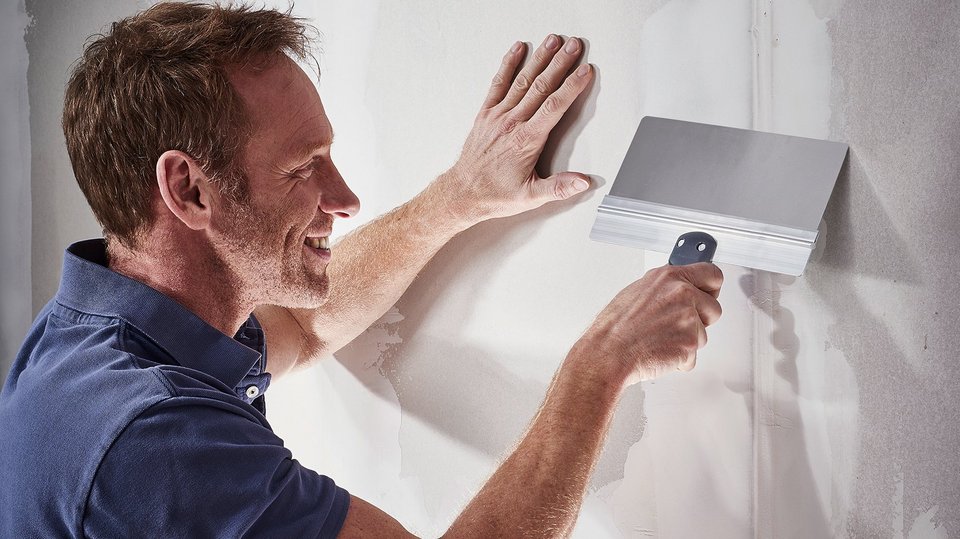
Then plaster over all holes, screws and other uneven areas. Use a wolfcraft surface scraper to work with maximum speed and efficiency. Plaster joint filler into the joints with a scraper and smooth over lightly with the smoother.
For this, mix your joint filler in a clean container as recommended by the manufacturer.
Filling corner joints

1. Open the empty cartridge using the cartridge knife, which incorporates two protected cutting zones for opening the cartridge as well as cutting the tip off at an angle. The knife cuts the tip in the same way as a cigar cutter, with the angled contact surface creating the ideal angle for the cartridge tip.
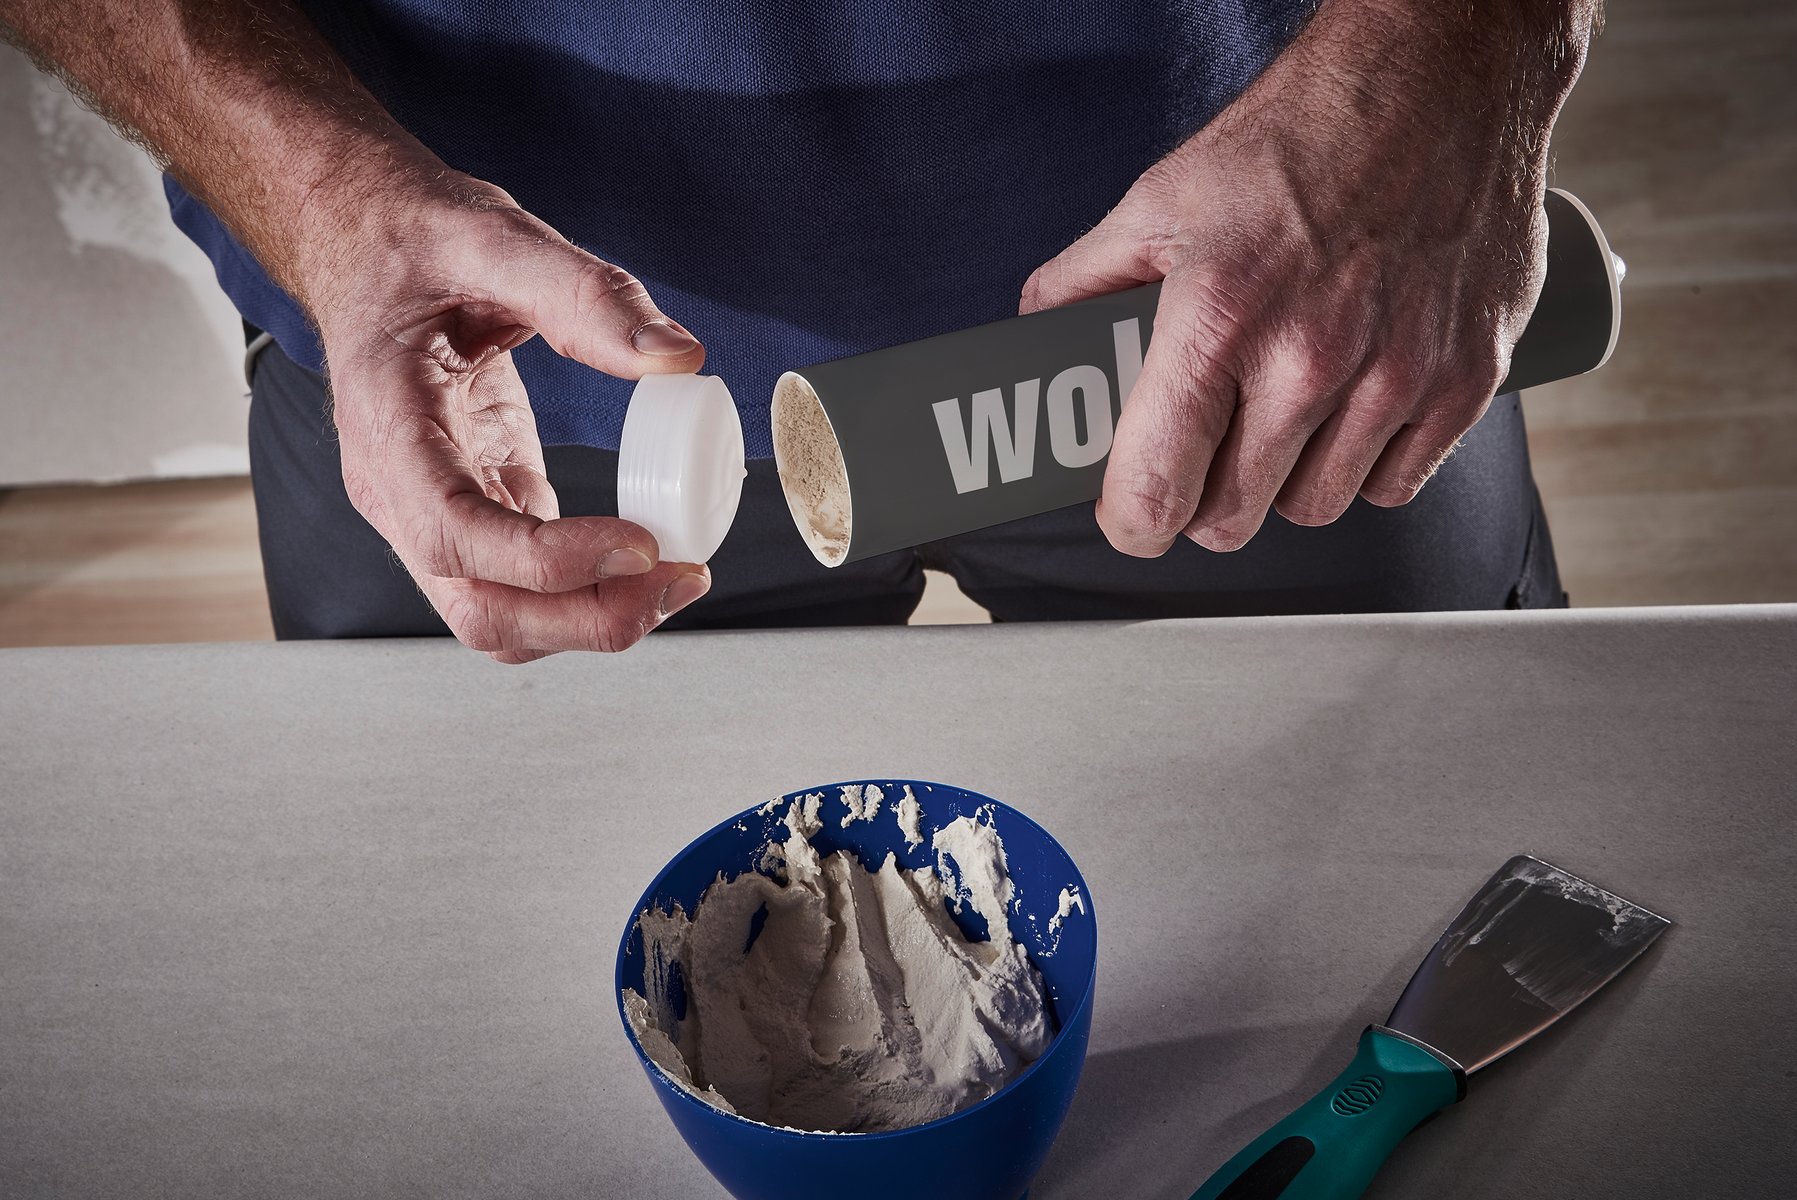
2. Remove the base of the empty cartridge and fill it with filler material using a scraper. The cartridge applies filler accurately into joints and prevents it from drying out quickly.

3. Insert your cartridge into a caulking gun. The MG 600 PRO is the ideal tool for this job because it can deliver extremely viscous adhesives and sealants with ease.
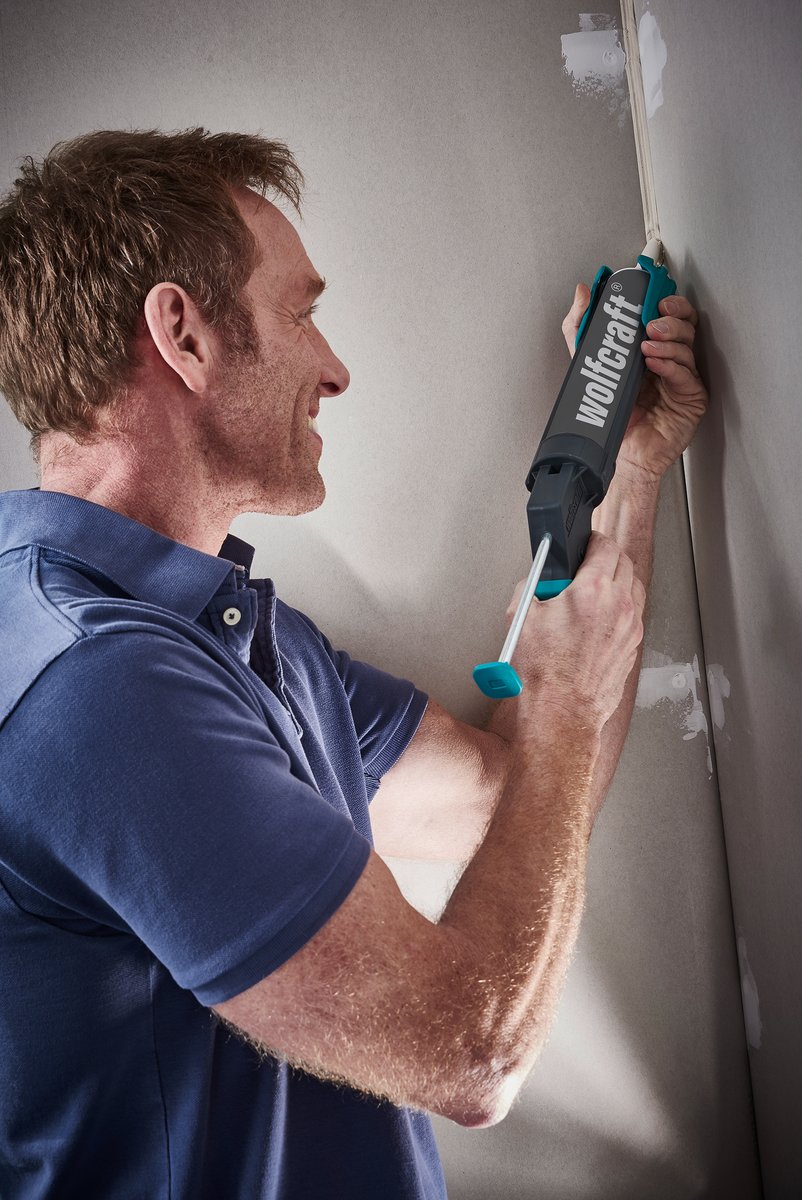
4. Apply the sealant into the joint. The cartridge can reach into particularly awkward corners.
5. Smooth over the joint using a suitable smoother. A joint smoother made from low-maintenance silicone is ideal for the corners because it distributes the filler so cleanly.
Second filling step
Once the filler is dry, use the surface scraper to scrape off any excess filler and burrs. To achieve a better surface finish, you can perform a second, finer round of filling and scraping once the first round of filler is dry.
You can also use joint cover strips on pieces of plasterboard with flattened longitudinal edges. Three working steps are required here.
9. Sanding
Now most of the hard work is done, you can focus on fine sanding. For a smooth surface finish, the joints between the gypsum plaster boards in particular require thorough sanding with the hand-held sander. Here it is important to make sure that the cardboard layer is not damaged.
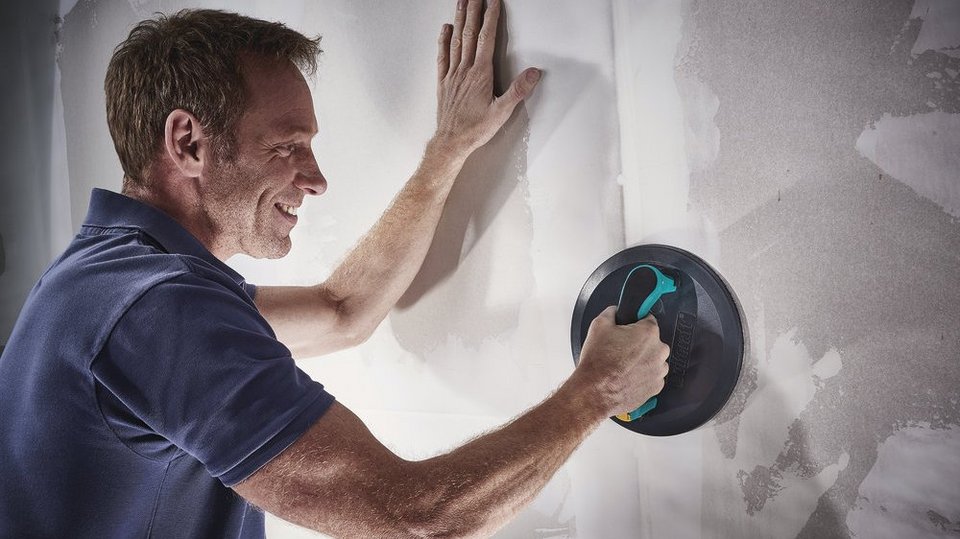
Ergonomic Sanding
wolfcraft has developed the ergonomic 225 mm surface sander for quicker sanding and greater stability when working on walls.
All commercial grit cloths with a diameter of 225 mm can be attached to the Velcro fastening. The more carefully you perform this sanding process, the smoother the result will be.
First sand with a coarse grit and then switch to a fine grit for the second pass. It will be worth it!
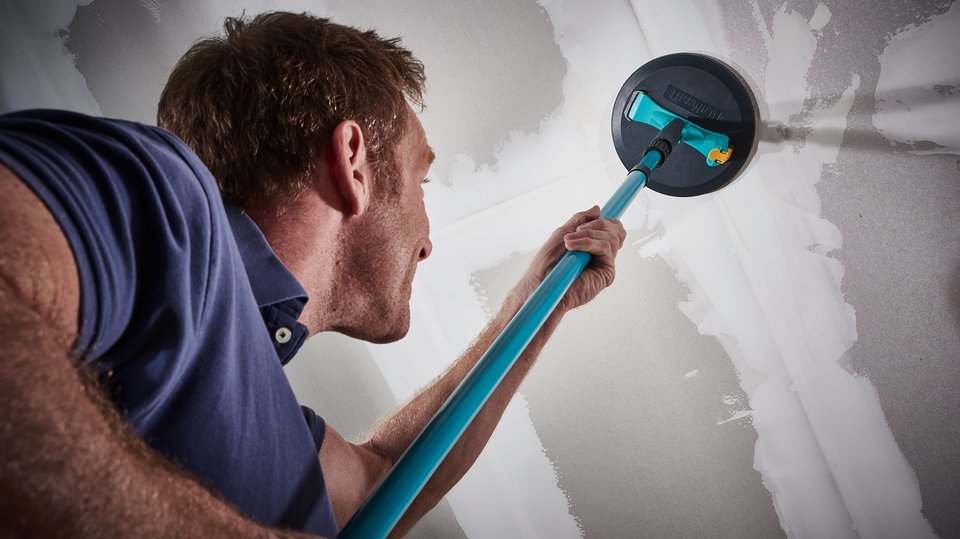
Sanding Ceilings
You can hold the surface sander in your hand or attach it to the telescopic handle to work ergonomically on ceilings and keep a comfortable distance from any dust generated when sanding walls.
Downloads

Drywall guide & Shopping list for building drywalls
Drywall construction – Explained step by step
Other Projects
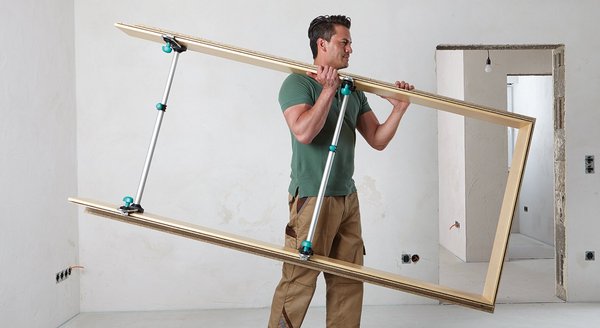
Installing Doors
Our tools make installation so easy that even inexperienced DIYers can approach this task with confidence.
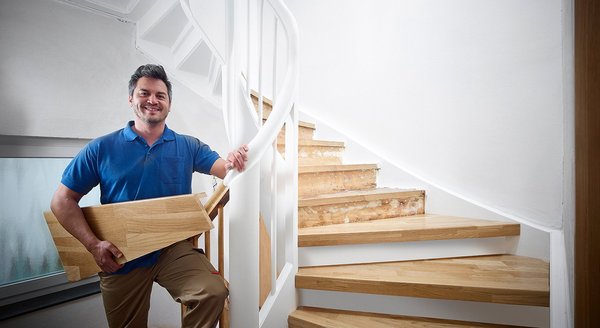
Renovating Stairs
Save several thousand euros when renovating your old wooden stairs. Our stair gauge delivers perfect results.


