Flexible and Functional: The Stair Gauge
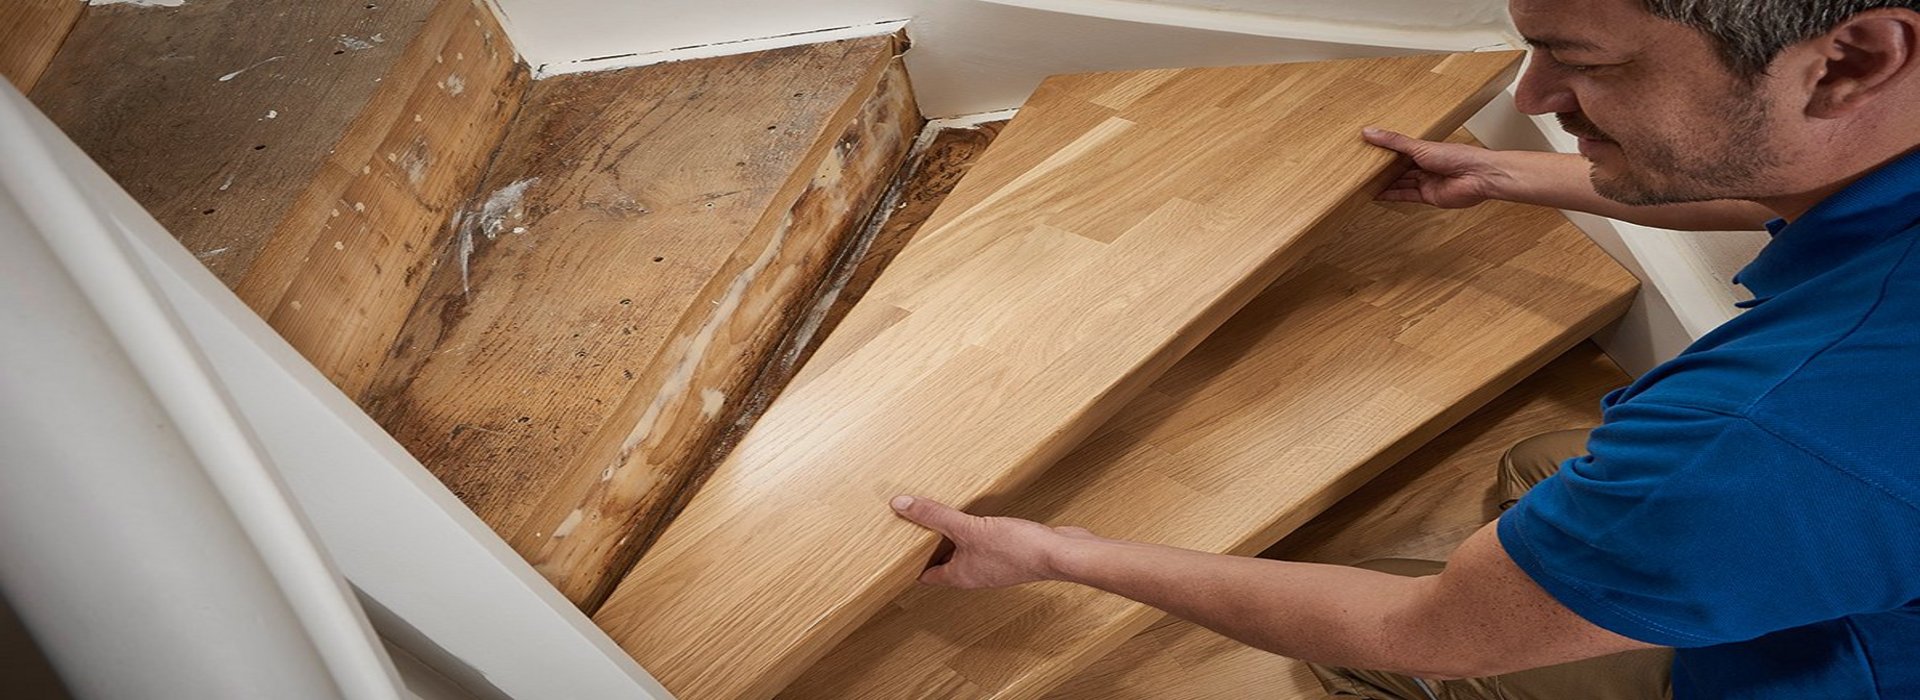
Renovating an old wooden staircase is one of the most ambitious DIY projects out there. Up to now, uneven angles and curves as well as essential expansion gaps and material allowances have confounded even the most proficient DIYer.
Thanks to the stair gauge, measuring complicated step surfaces can now be done easily and effectively. This means that even less experienced DIYers can tackle this project, saving thousands in costs.
Contents
- Step 2: Attaching the spacing guides for expansion gaps
- Step 3: Adjusting the template
- Step 4: Measuring and calculating the material allowance for the riser
- Step 5: Fastening the overhang measuring device for steps
- Step 6: Stabilising and removing the template
- Step 7: Transferring
- Step 8: Sawing
- Step 9: Installing the step
- Frequently asked questions
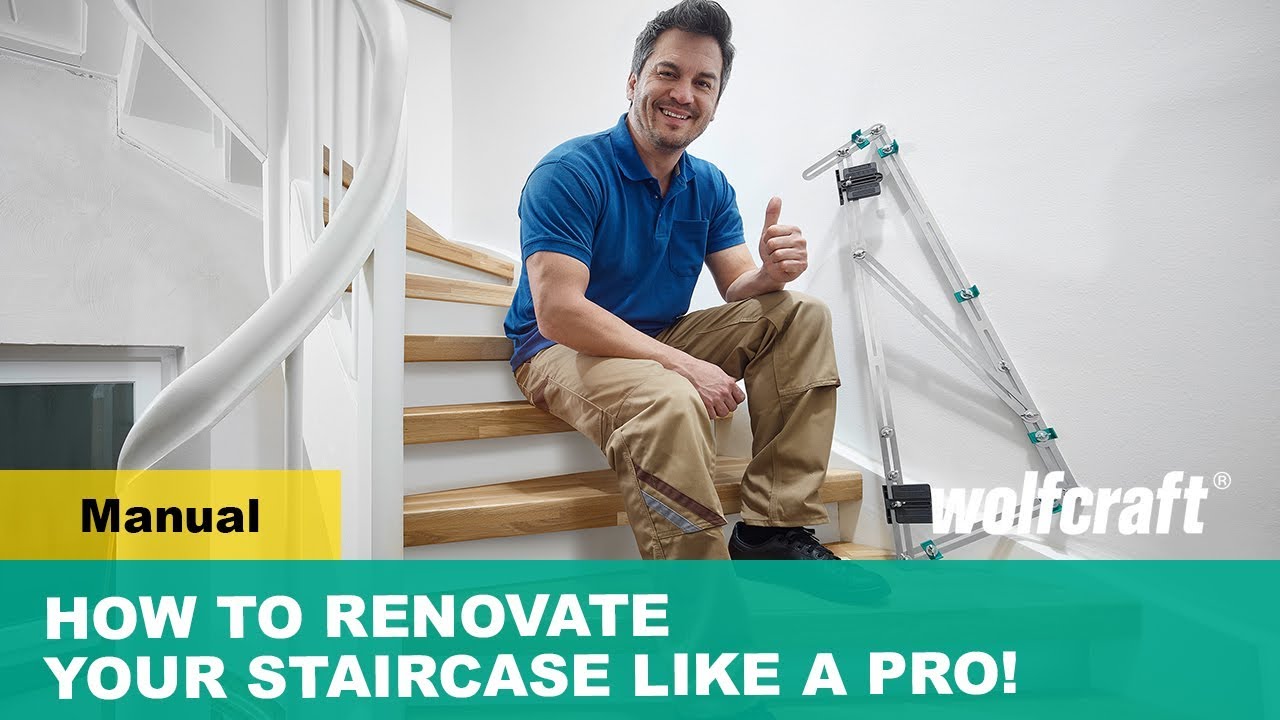
Instructional Video: Renovating Stairs
The video will show you how our stair gauge works and how to easily measure complicated steps.
Step-by-Step Instructions: Renovating Stairs
Step 1: Laying out the steel rails
The set contains 15 galvanised steel rails in different sizes. Choose the correct sizes. Next lay out the lengths and angles of the step, taking care to map out the full contour.
It is entirely acceptable for the elements to overlap here. Use the chain element included in the set for rounded contours such as those found in spiral staircases in old buildings. Next join the rails using the bolts and wing nuts.

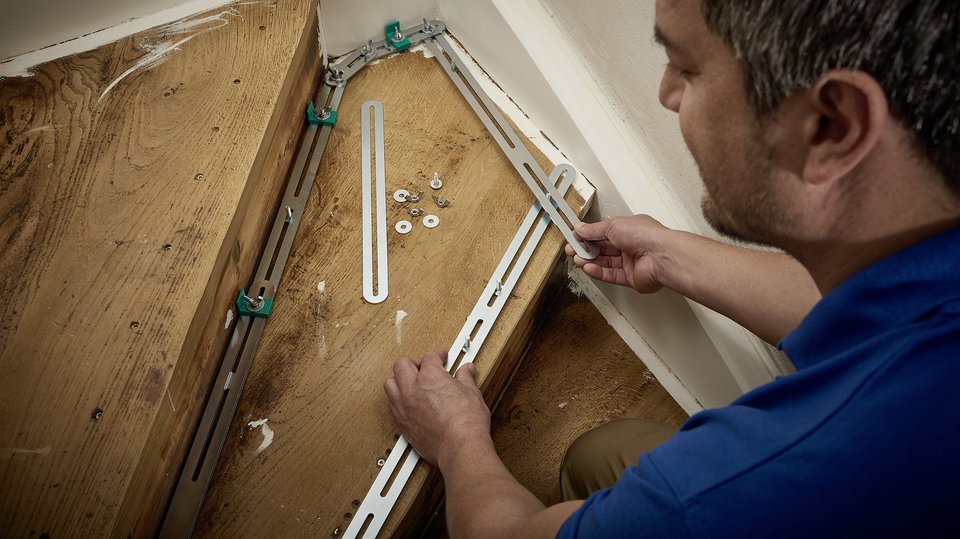
Step 2: Attaching the spacing guides for expansion gaps
Attach the spacing guides for the expansion gaps to the sides that will be touching the wall. Use the bolts and wing nuts for this too.
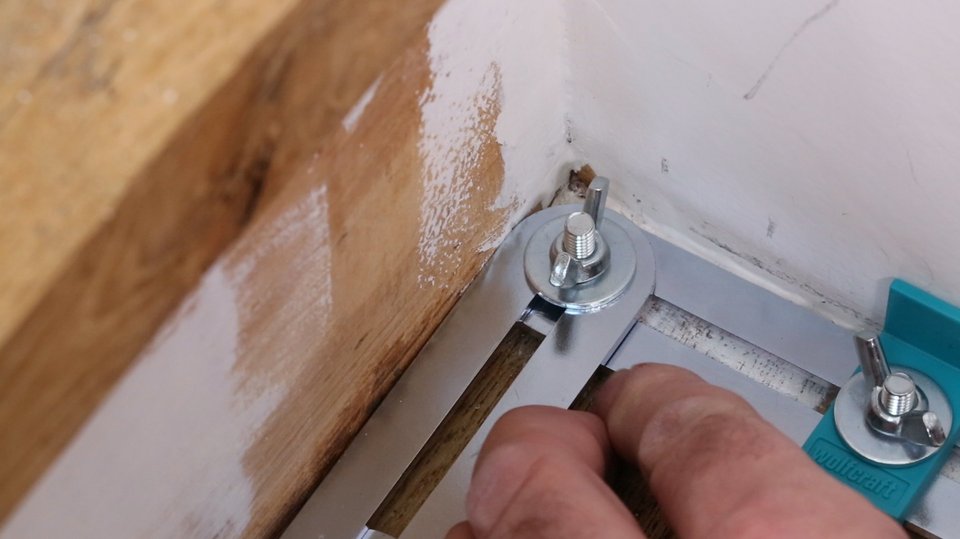
Step 3: Adjusting the template
Align the template together with the spacing guides for the expansion gaps precisely with the contours of the step and the wall profile.
Once you have made your adjustments, tighten the bolts to stabilise the template.
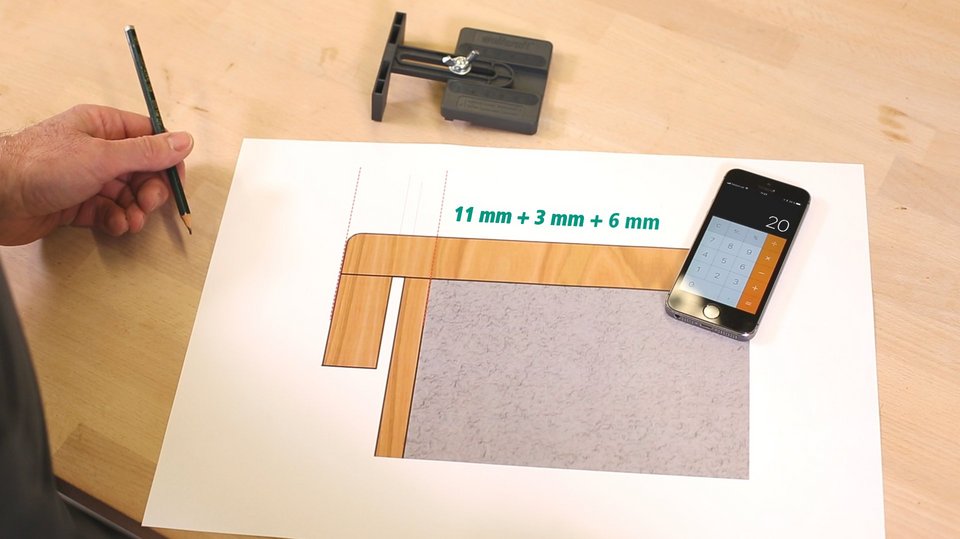
Step 4: Measuring and calculating the material allowance for the riser
If you are also replacing the riser (i.e. the vertical step surfaces), you must add the thickness of the riser material to your step's depth measurement. In the instructional video, we calculate this to be 6 mm.
You should also add a material allowance of 3 mm for the expansion gap as well as the overhang you want for the step (in the example 11 mm).
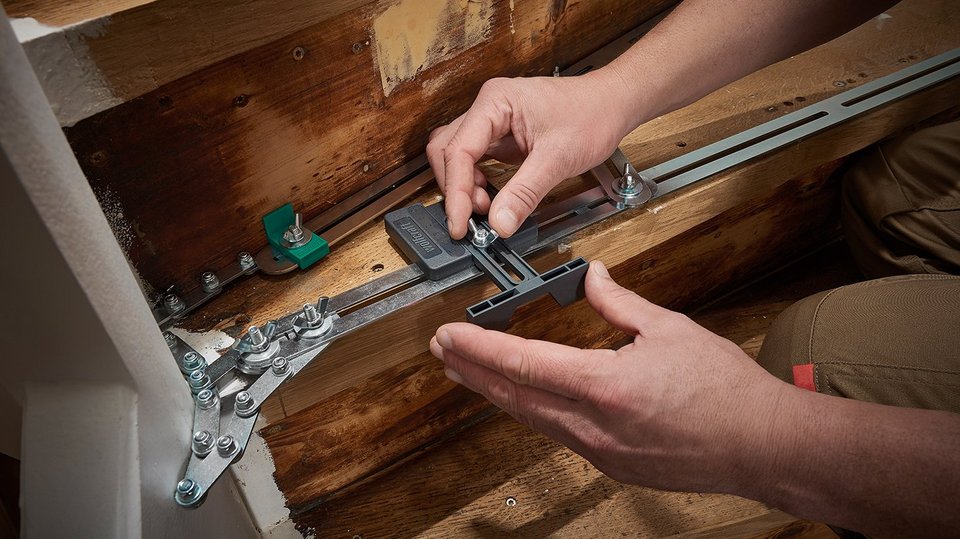
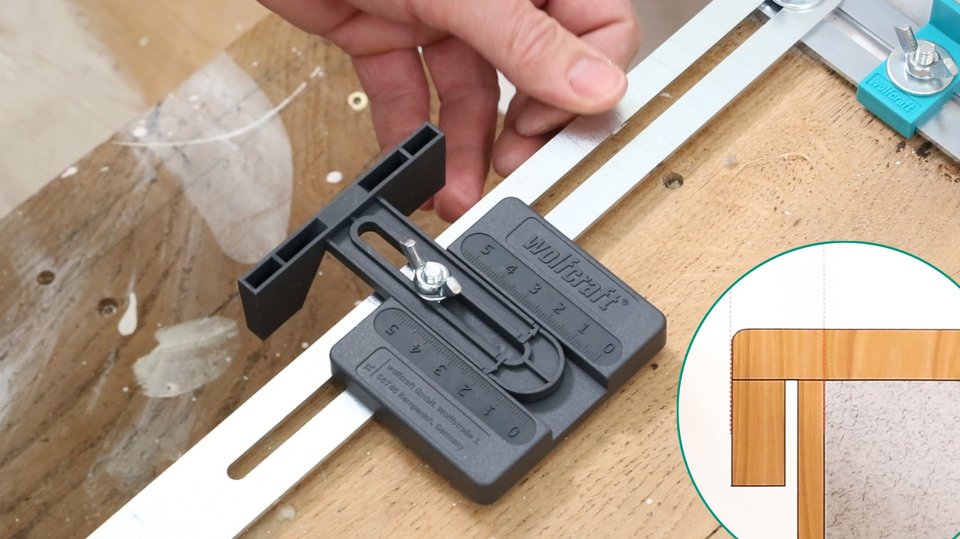
Step 5: Fastening the overhang measuring device for steps
Fasten the two overhang measuring devices included in the set at two points on the leading edge of the step or the long side. The overhang measuring device consists of two parts. Position the larger part with the scale upwards over the rail.
Guide the bolt through the aperture and insert the slider. Fasten the two parts in the position you want using a wing nut. Read off the correct distance (in our case 20 mm) on the scale and tighten the bolt.

Step 6: Stabilising and removing the template
Check whether all elements are firmly connected by the wing nuts. If not, retighten them again. The template is now stabilised and can be removed.
The multiple fastening points prevent the measurements being lost during transport, and enable you to transfer the stair gauge to the step blank with confidence.
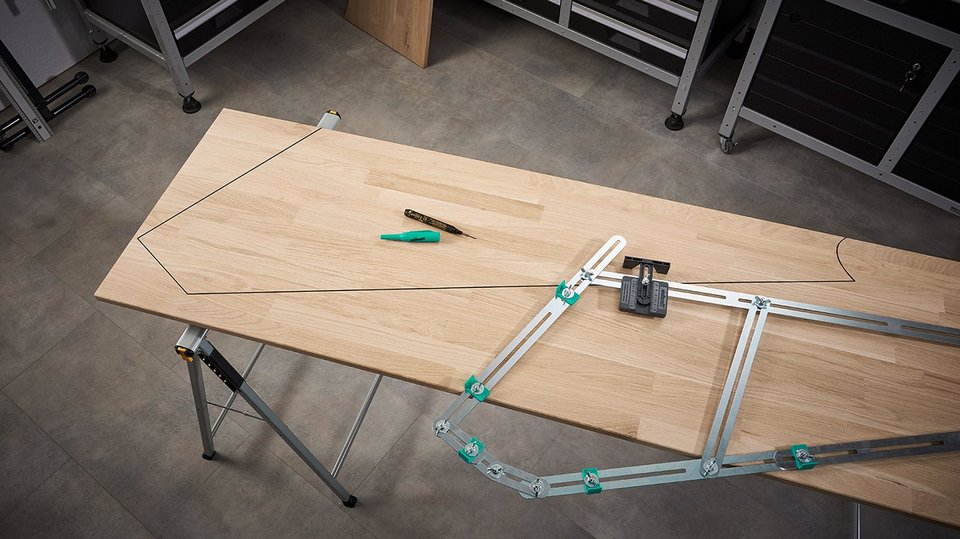
Step 7: Transferring
Place the template on the workpiece and position the stops of the overhang measuring device precisely on the front side. You can now transfer the contours to the wood by tracing along the steel rails with a pencil.

Step 8: Sawing
Saw the step along the scribe line using a guided circular table saw or jigsaw.
This gives you a perfectly fitting step that correctly reproduces all the expansion gap dimensions and material allowances.
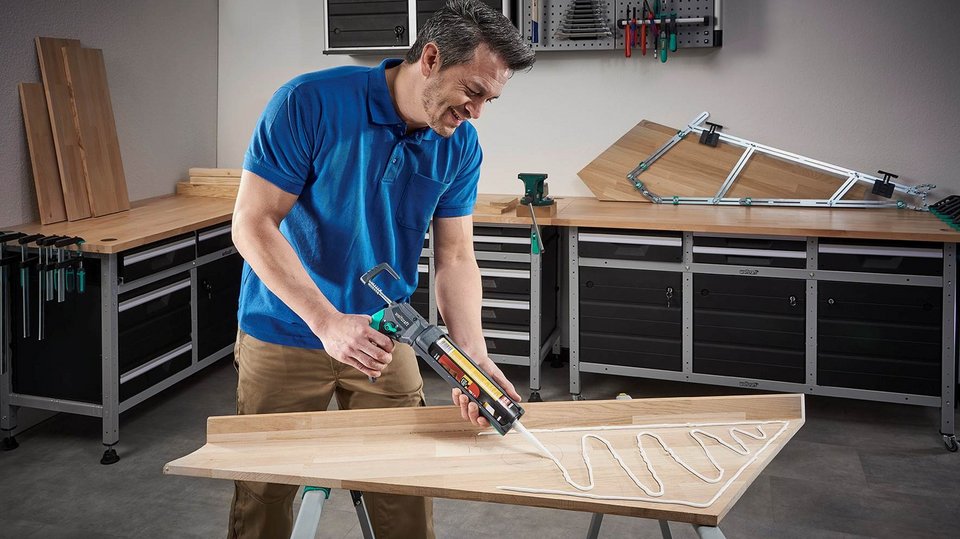
Step 9: Installing the step
Use a suitable construction adhesive in a 300 ml cartridge and our Caulking Gun MG 600 (art. no. 4356000) to install the step.
Apply the adhesive in a wavy pattern over the entire surface. You can now insert the step and press lightly.
Frequently asked questions
What sizes of steps can I use the stair gauge on?
What sizes of steps can I use the stair gauge on?
The stair gauge consists of a set of rails of different lengths, giving you good flexibility when it comes to shape and size. You can gauge steps up to a maximum width of 1.2 metres with ease.
Can I also use the stair gauge on steps with uneven angles?
Can I also use the stair gauge on steps with uneven angles?
Yes. The modular system gives you great flexibility in terms of the step shapes that can be gauged.
Can I use the stair gauge on curved steps too?
Can I use the stair gauge on curved steps too?
Yes, with the flexible chain element you can also gauge curves.
What do I need to keep in mind when renovating wooden stairs?
What do I need to keep in mind when renovating wooden stairs?
If you are using wood as a new covering, you must make sure that you can insert the step with a snug fit. Since wood is "alive" and expands (depending on the type of wood and how it was treated) and you want to avoid creaking (rubbing of the step against the side stringers), we include spacing guides with the stair gauge that allow for an expansion gap of 3 mm. This gap makes sure that the step can be inserted with ease and that the wood has enough room and space.
What kinds of steps can I renovate using the stair gauge?
What kinds of steps can I renovate using the stair gauge?
The stair gauge gives you good flexibility here too. You can insert steps that fit flush with the riser as well as steps with an overhang. We also provide the overhang measuring device in the set as an accessory for including an overhang or material allowances for steps.
Other Projects
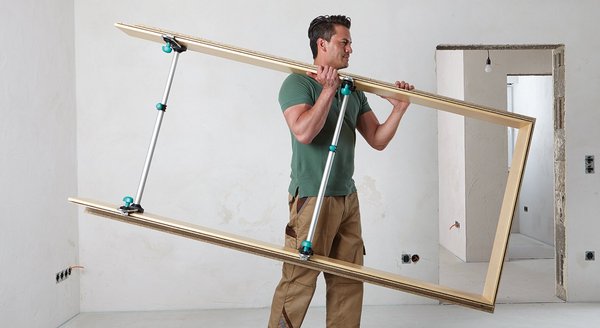
Installing Doors
Our tools make installation so easy that even inexperienced DIYers can approach this task with confidence.
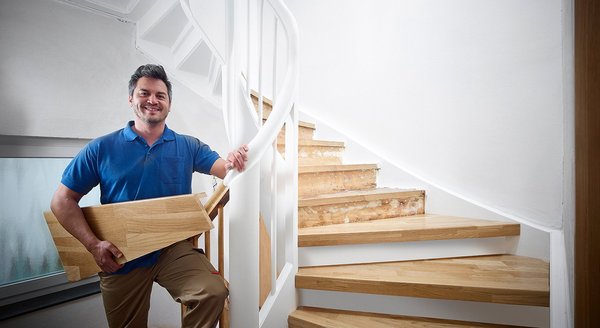
Renovating Stairs
Save several thousand euros when renovating your old wooden stairs. Our stair gauge delivers perfect results.


